Monday 11 October 2010

Row Houses

I've been a bit quiet of late - a week in Germany visiting family and the ongoing loss of my muse following the collapse of my marriage have both contributed. I hope to get back into art soon because it takes me out of myself and gives me pleasure (once I get going!) and I need all the pleasure I can get at the moment!

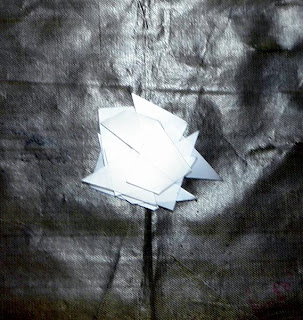
I reluctantly began making some 'row houses' for a swap. They needed to be house shaped, between 1.5 and 2.5 inches wide and between 3.5 and 6.5 inches tall, be in autumnal grungy colours, and to have a face on them.

After looking at lots of scraps of card and lots of face images for a long time, this is what I came up with....


Saturday 11 September 2010

Fabric paper wall hanging

This was quite a quick project using fabric paper. I used remnants from 3 sheets of fabric paper I'd made a while ago - deep pink, purple and blue. I backed them all with felt, cut shapes out and sewed around the edges. I did a bit of free motion embroidery on the blue piece.

I coloured some paper flowers, then layered them with beads and sequin flowers and sewed them to the fabric paper shapes, then added more sequin flowers, beads and ribbon. A couple of squares with flowers and brads, and a few tiny tags with charms and brads finished the piece off.


It will be going to a new home at the end of the month, I hope whoever gets it likes it.

Tuesday 7 September 2010

Fabric postcard

I have been on a couple of Angie Hughes courses at Ledbury Artspace recently. The first course was all about working with velvet, transfer foils, organza and stitch. I have a half finished piece from that course, but as I have very little experience of free motion embroidery I wanted to get more before I try and finish it off.

So, I thought I'd make a fabric postcard as a practice piece.

I took some red cotton velvet and masked out some rectangles then ironed bondaweb all over it. I covered it with organza and stitched around the rectangles, then used vermicelli stitch to cover the area around the rectangles, using a variegated thread. I hand sewed little flower sequins and beads into the rectangles. Finally, I backed the piece with pelmet vilene and finished the edges with a zig zag stitch. Frankly, I was surprised at how well it went, because I still don't feel competent with machine embroidery!

Monday 6 September 2010

Paverpol - Altered Element design team


Altered Element sent me some Paverpol fabric stiffener, some Paverplast, and some 'fabric' for use with Paverpol which is made from beaten tree bark (looks a bit like a very large piece of flattened silk rod!). These materials are all way out of my comfort zone, and I wasn't sure what the heck to do with them!

I surfed the net to see what other people had done with Paverpol, and it was interesting to see, but not 'me'. So I had a little play, and here are the results of my experiments.

I wanted to see if Paverpol could stiffen fabric yet maintain transparency. And the answer is - sort of! I covered a glass bowl with cling film, then draped organza over the top. I cut some excess organza away, then applied the Paverpol fabric stiffener with a paintbrush, and left to dry. Once dry, I trimmed the 'brim' into a flower shape. This is the result:


It's sort of pretty, but a bit flimsy. I had planned to add some hand embroidery - maybe some french knots or lines of stitch form top to bottom, but it is too flimsy for that. I may yet add some curved lines of Friendly Plastic all around the outside of bowl sides, to make a sort of supporting framework, and perhaps do some gold stitching afterwards. If I can find time and my mojo at the same time!

My second experiment with Paverpol was to use it to stiffen and adhere fabric to a metal tin - every other glue I have tried has left bubbles or marks, so I was very pleased to see that the Paverpol left a flawless surface. This was very easy to do - just cut a straight edge at the bottom of your fabric, add Paverpol to the tin itself and start wrapping your fabric around the tin, coating with Paverpol as you go. I then took some thin strips of gold Friendly Plastic, heated them in a puddle of water in my melt pot, and squiggled them around onto the tin. The Friendly Plastic adheres to the fabric really easily - which can be both blessing and problem LOL.

I love the fabric I used - I've been hoarding it for ages!


I finished it off by adding 3 turquoise Friendly Plastic 'flowers', made by laying a strip of FP on a non stick sheet, heating with a heat gun, using a cutter to cut the shape, and allowing to cool completely before removing the shape. I laid the flowers on top of the gold squiggles, heated it all with my heat gun and used an embossing tool to make a centre and some depressions in the petals. I rather like this!


I will try to play with the Paverplast soon but that may be more of a challenge...


Sunday 8 August 2010

Something a little more personal - a different kind of art

Some of you may know that I was diagnosed with breast cancer 5 years ago. Next week will be the five year anniversary of my mastectomy. I came across this poem today whilst looking for something else, and it touched me, so I thought I would share it with you. It comes from a publication called 'The Healing Muse'.


Your Breast a Unicorn

B.A. St. Andrews

I.
Uncut and unsewn my breasts nuzzle yellow silk secure as two fauns nestled in Debussy's dream, sun-dappled and safe, finding solace singly and together.

My heart beats staccato under slumbering glands of these breasts and I think about the milk of human kindness and my friend who, unaware, suckled an abomination which curled inside her softness and betrayed her.

Like Cleopatra's asp awakening on compassion's mound, on passion's curve, at consolation's center one aberrant cell metastasized, stirring from slumber to pierce with death that tender sweetness it had dreamt upon.

II.
She hates that phrase "lost a breast" with its insinuation of carelessness.

"It's not as if the three of us went off to market," she says, "my left breast, my right breast and I and one zipped off to ice cream while the other darted to bottled dressings and me just meandering beside vegetables stacked and clotted like a painter's palette with apricot,celeriac, eggplant, muscadine.

It's not as if I realized suddenly one of my breasts had gone missing and charged the courtesy counter breathless on the PA system announcing: I'm waiting on aisle nine for my right breast, my recalcitrant child who has spent her full, fragile, throbbing life with me so please return please and help me push the cart piled high with treats for her: my other darling, my rose-tipped girl, my comfort."

III.
Breasts make money, cut or uncut.

We speak of capital "B" breasts as if they were priceless organisms to be mined or culled or caught in the teeth and so they are.

The Breast is a bronze pendant, a cocoa fruit lopped from its emerald vine.

Breast is an apricot moon pinned to the vineyard of night a pool mirroring the love-sustaining needs of women and men, women and women, mothers and sucklings.

Breast, tumescent and detumescent as any male part, is mystical and defiled, swollen and confined, life-giving and powerful as Africa's Nile.

The Breast reigns: Queen of Solace, Empress of Amazons, Priestess of Pleasure.

We all worship the Breast, ripening or withered: first pillow, first nation, first food.

IV.
Your breast is gone, medically incinerated before we could place it among stars.

Lost as the unicorn, that ancient sigil of innocence, your legendary breast is extinct and wandering in fields of praise.

Like the Unicorn's, let your struggles be woven into tapestries and hung in halls of queens and heroes.

Let your face be fashioned of herbs and flowers; let your courage be emblazoned in golden thread so light-yielding, so steadfast that fragile sister ships may, by your radiance, glide unperturbed past shoals and reefs of fear and anguish which lay siege on every heart.

By your burning may ships heavy laden, carved with busts of mermaids and deities who tame wild seas, deliver safely their cargo of women brave and beautiful as you.


To celebrate the five-year anniversary of my cancer surgery, I am considering covering the horrible mastectomy scar with something beautiful.

I, who have always eschewed tattooos, am thinking of having a very personal piece of art of my own placed on my breast, so that when I look in the mirror, I will no longer see puckers and lines, but beautiful designs....


Wednesday 4 August 2010

Oooer and crumbs! Altered Element DT pack

Oh my goodness.

This month's Altered Element Design Team pack is Paverpol.

I have a sheet of Paverpol Reliefdecoration, to 'decorate Paverpol statutes', a bottle of Paverpol Transparent craft medium, and a tub of Paverplast.

I have no idea what to do with this stuff! Off to do some research and thinking about what I can create with it all.

Watch this space!

Monday 2 August 2010

Gothic arch chunky book

I am taking part in a chunky book where the pages are shaped like gothic arches. The pages need to be grungy with a touch of metal. I've been trying to step out of my colour comfort zone (turquoise!) so chose deep red with black for the pages.

I had some textured glossy card, which I painted with about a dozen layers of fluid acrylics in deep iron oxide red and orange. This gives a lovely leathery finish. I added some black lace, an image, some german scrap, buttons and brads and a couple of words.


For the backs, I used two or three colours of colourwash sprays, then inked over a fern frond using red distress ink, to add a bit of pattern. I stamped some lines towards the right hand side, then added some black stamped and embossed butterflies. I hope they are gothic enough!

Thursday 29 July 2010

Button it!

My last Altered Element DT pack included some Grungeboard. I've never used this stuff and was not quite sure how to work with it. I used a Cuttlebug heart die and folder to cut it and add texture. I coloured it with a colourwash spray, and once it was dry I added highlights with Treasure Gold.


I painted a 4 x 4 canvas with several thin layers of fluid acrylic paints and overstamped with Stazon. I used fine brass wire to attach the button, ribbon and Grungeboard heart to the canvas, then sent it off to Fiona.

I completely forgot to sign it...

Tuesday 27 July 2010

Metal heart

I absolutely love these Patera metal jewellery findings from Nunn Designs. They come in a range of shapes in gold, silver and copper, and best of all there is a punch which goes with them, and which punches collages, fabric paper etc to exactly the right size to glue into the pendants.


I punched a piece of fabric paper, glued it to a piece of felt, and sewed tiny sequins and beads onto it before stamping and embossing it to add touches of gold. I used a stamp from my last Altered Element DT pack. A few dabs of glue later, and I had a unique piece of jewellery to send off to Hilda!

Tuesday 6 July 2010

Altered Element surface design pack - more twisting Tyvek

I thought I'd try another way of working with Tyvek, so I gave one side of this piece a thin layer of watered down fluid acrylics in Nickel Azo Gold, and Jenkins Green.


Once the paint was dry, I cut the piece in half, and turned one piece over so that the painted side faced down. I covered the Tyvek with silicone baking paper, and used my iron to distort it. This is a process where you don't have much control, Kim Thittachai says the secret is to 'kiss and caress' the paper with the iron (definitely don't apply any weight or pressure, the iron should hardly touch the paper). The tyvek always distorts so that the 'creases' are nearest the iron, and the rounded 'valleys' are furthest away.

If you click on the picture below to enlarge it, you can see that the piece on the left is the side where the unpainted side was nearest the heat of the iron, and the rounded areas are more prominent, whereas the piece on the right had the painted side nearest the heat and the creases are more prominent.


My tyvek now had interesting texture and shape, but I wasn't sure what to do next. So, I cut one piece up, using the lines which had formed when the Tyvek was distorting. That gave me some interesting shapes. And then I had a moment of madness and decided to attempt an abstract embroidery piece!


I used my embellishing machine to create a piece of wool and silk felted fabric to use as a background. I then laid one of the Tyvek pieces on top, and used some hand painted silky thread to attach the Tyvek using some irregular cross stitches. The Tyvek was surprisingly easy to stitch through.

I finished the piece by adding some french knots to the background, and some beads tothe Tyvek, to give the piece more texture. You can see some of the detail in the pictures below.


I think I'll use this as a book cover.


Altered Element surface design pack - Tyvek

Tyvek is funny stuff - it is used in the building industry and in textile art. I remember the Guardian printing a newspaper supplement on it sometuime around 1990, anmd saying how it would be one of the materials of the future... but I never imagined I would be making art out of it!

I coloured the tyvek with watered down acrylic paint, applied using a baby wipe. You only need a thin layer of paint, especially if you are going to heat the tyvek, as the paint acts as a resists to the heat - so, lots of paint=difficult to heat & distort. I coloured both sides of the tyvek, you can see the coarse 'fibres' take colour differently to the finer ones.


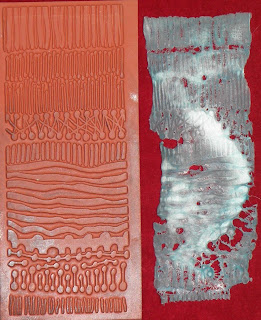
Next, I cut the tyvek up and laid pieces onto deeply etched rubber stamps with bold designs, added a layer of silicone paper to protect my iron, and used the iron (on a cotton setting) to heat and shrink the tyvek. This process can be unpredictable - my iron wasn't hot enough the first time, so I was left with big patches of unmelted tyvek, and it was too hot the next time, so the tyvek disappeared! This is about right, when it melets soem away completely but doesn't leave you with unmelted areas. I need to fine tune it a little bit more as it is still melting more tyvek away than I'd like, whilst leaving patches unmelted.


Next, I tore the melted tyvek into smaller pieces, and added them to a mask (protected the mask form with greased aluminium foil) covered in Perfect Paper whilst it was still wet. The perfect paper dried and the tyvek is inlaid into it. I think I may add colour to the paper parts, and Treasure Gold to add glints afterwartds. I may even post a pic when it's finished!


Monday 21 June 2010

Altered Element DT surface pack - Stampboard

I once received a beautiful Stampboard triptych from Trizzy - this is my version, which is very different! I used watered down lettuce and stream inks, stamped with black Stazon, and added Golden mica flakes for a bit of glitz. A couple of paper flowers and a gem or two, and it was finished. I just glued two tiny brass hinges to the back, and it stands up nicely!

Sunday 20 June 2010

Needle felting

A couple of weeks ago, two friends of mine pointed me in the direction of a brand new Merrylock Embellishing machine on EBay. I was very fortunate to win the machine for £62.99 and I collected it 10 days ago. I didn't find the time to start playing with it until Thursday, and I finished my first project today.

I have seen a number of felted projects which have been beautifully done, but using gross (in my opinion!) colours. I thought I'd make something subtle. I took a base of acrylic felt, and felted some grey-black wool to it. Once I'd covered the felt and made a nice base, I took some more yarn and wound it into spirals, and felted those to the base. I added some simple fly stitching in a shiny crimped yearn, and some french knots in a hand dyed grey & pink perle cotton, and I *think* it's finished.


I'm not sure though - part to me feels there should be a focal point, but I'm not sure what it could be, or where to put it. I'll look at it over the next few days and see if anything suggests itself...

Friday 18 June 2010

Altered Element DT surface pack - shrink plastic

Shrink Plastic. Versatile stuff which comes in black, white, translucent and clear. Reputation for being tricky to use. But is it? If you work with it on a non stick surface, and use a 'hairdryer' type heat tool, I find it behaves itself. Just remember less is more when adding colour - what looks like pastel colour will turn out quite brightly! I use Stazon, Brilliance and Fluid Chalk inks successfully (although you have to leave the Brilliance to dry overnight or shrink the plastic VERY carefully!) Once it starts curling I often aim the heat gun at the underside and it kinds of curls back down.

This is a very different way of using Shrink Plastic - 'distressed shrink plastic', as taught to me by my friend Jessie in New Zealand. Take a piece of shrink plastic, a heat gun, a non stick craft sheet, a texture rubber stamp, and a metal skewer (or use your craft knife, palette knife or similar).

I used a piece of translucent shrink plastic about 2 x 2.5 inches.


Cut the shrinky stuff into irregular triangles and kite shapes. You can also punch holes in them at this point, it adds more texture to the finished piece. Pile them up on the craft sheet.


Have your metal skewer ready, and your rubber stamp. Heat the shrink plastic with your heat gun - preferably a 'hair dryer' type (it doesn't blow things around as much). It will start curling, if any pieces decide to leave the pile, push them back. when it looks as if it's all or nearly all shrunk, stamp into the pile with your rubber stamp - push down hard and hold the stamp there for about 30 seconds.

I wish I had another photo to show you how it looks now, but the one I took was too fuzzy.

Your shrink plastic will look textured, and have an odd shape. It might not look too inspiring at this point. Persevere! Add colour - I use alcohol inks, but I guess acrylic paint or Stazon or Brilliance ink would work.

Once coloured, apply wax rub on to the edge with your finger, then go lightly over the top with the rub ons. I use Treasure Gold (Wendy will be surprised LOL) because of the depth of colour and the fact that it dries to a permanent finish. You can use the 'palette' type, and either use a fixative or wait a week until they have set permanently.

This is what you can expect it to look like at this point.
(sorry about the slightly fuzzy photo)


Here's another.


And this is how it adds dimension to my finished chunky book page - the page had looked too 'flat' to me, but I needed the embellishment to be unbreakable, quick, easy, and in the right colours for the page. This simple 'distressed shrink plastic' element does all of that, and was very quick and easy to make.


Monday 14 June 2010

10% discounts at the Altered Element during England games

Read more about how you can get 'World Cup discount' on all Altered Elements orders of wonderful goodies during England games:

http://alteredelement.blogspot.com/

Wednesday 9 June 2010

Altered Element DT pack

This month's Altered Element DT pack is all about surfaces. It contained sheets of metal, tyvek and translucent shrink plastic, mini canvas boards, chipboard, stampboard, fusible film, glass squares, some tea dyed fabric, some grungeboard and some polymer stamps form Artemio.

Gazing into my crystal ball, I foresee many projects....

I started with a mini canvas which incorporated fusible film and shrink plastic.


Fusible film always looks much better on a dark surface, so I coloured the canvas with the Crafty Notions opaque black colour spray.


I coated the canvas with PVA glue ot hold the film in place, then covered the canvas with a sheet of silicone paper, and ironed the film onto the canvas - my iron gets used more often in art projects these days than it does for smoothing out creases in my clothes!

The more heat you apply, the more colour change you get in the fusible film, but you do have to be careful not to heat it too much or it disappears in patches - if this happens to you, just lay another piece of film over the top and iron more carefully, it will fuse to the layer you've already added without any need for glue. This is how the canvas surface covered with fusible film looks.


Next, I considered embellishments. I punched 5 'inchies' of translucent shrink plastic, and daubed Stewart Gill Byzantia paint thickly on top - using two colours.


When heated, the plastic shrinks as the paint dries, and the surface of the paint forms lovely little shimmery ruffles...


I used some angelina fibres, ironed between two pieces of silicone paper, to make a small sheet of texture, and ironed that onto the left hand side of the canvas. I glued the small shrink plastic and paint squares onto the angelina, then added a transparency and a german scrap 'frame', and here is the finished canvas:


Add Image

Altered Element Upcycle

My purple pack of pure pleasure arrived from the Altered Element last week - each item is beautifully wrapped in brown paper bags and purple tissue, and it always feels like opening Christmas presents!

This month's Upcycle element was a very old booklet of sheet music, and I did use some of it in the hanging ATCs in the last blog post, but I also used it more obviously to create this little heart box.

I cut the sheet music and glued it to the box with gel medium - I like to use this because it is 'drier' than glue and tends not to make the paper bubble when adding it to a solid surface. Once adhered and trimmed, I painted a fabric flower, the rim of the lid, and the interior of the lid and box with Radiant Rain in Jasper Red. I gave the whole box a coat of acrylic wax to give it some protection, and added the flower with a tiny brad.


Sunday 6 June 2010

Hanging ATCs

I am in a swap where we made a set of 3 hanging ATCs - any theme, colour scheme, media or way of hanging. I decided to combine metal with paper, and made 3 ATCs in my favourite colour combination of turquoise and copper.

The hanging 'mechanism' is 5 pieces of copper wire, twisted together and curled at the ends. I patinated the copper lightly so it has some areas of light turquoise verdigris. The ATCs are attached to the twisted wire 'hanger' using jewellery findings - eye pins, head pins & bead caps.


The ATC backgrounds are deli paper sprayed with colour wash sprays, glued to cardstock. Old sheet music which has been stained with watered down Crafty Notions Creative Colour Spray in turquoise, plus some which has also been dry brushed with white gesso, are layered onto each ATC. Tags sprayed with Sticky Fingers Maple winter ink colourwash spray and the turquoise are wrapped with more sheet music with words stamped on top, and punched flowers with tiny brads were added . To finish the ATCs, I glued on copper coloured metal embellishments from the US, and a letter 'A' triple embossed on cardstock.

I hope Annie likes them!

Leonardo chunky book page

Leonardo Da Vinci was such a special man - a scientist who recorded his ideas and inventions through drawing, as well as an artist who painted the most fabulous paintings. I am involved in a Da Vinci themed paperbag book, and have finished my first page.

I mixed a little yellow ochre and a drop of transparent red oxide with a dollop of liquid gloss medium and a smaller dollop of white gesso. I used this mixture to coat Fabriano hot press watercolour paper, then dabbed it with a crumpled up magazine page to texturise the surface and remove the brush marks. I used a piece of Ranger Cut'n'Dry foam to rub around the edges with yellow ochre chalk ink, then a thinner layer of burnt sienna on top.

I stamped the image with the same burnt sienna fluid chalk ink.


The tag was a manila shipping tag, which I dabbed with black, burnt umber, Payne's grey and bronze acrylics, again using a crumpled magazine page. Once dry, I applied slivers of textured papers (painted bronze to match the background) down the right hand side, and stamped and embossed a pen down the left hand side, before adding a slip of paper stamped with the word Leonardo coloured to match the main page. A few fibres threaded through the tag finished the page off nicely.

Monday 24 May 2010

Fusing Fabric

I have been fascinated by the concept of fusing fabrics and cutting them with a soldering iron. I bought Margaret Beal's 'Fusing Fabric' book a couple of years ago, and had a little play using a Walnut Hollow hot tool but it was so hot I had no control over where and how fast the organza I was trying to fuse went up in smoke!

I visited Margaret's stand at the NEC in March, and bought her own brand of soldering iron, which has a much longer and finer tip than the hot tool I'd been trying.

So, I took the plunge and had a little play. I laid some acrylic felt on a ceramic tile, laid 3 layers of organza (or two of organza and one of net) on top, then used a metal flower shape to 'cut' around with the soldering tool. It worked beautifully, but I need more practice to work with the layered fabrics to fuse them together without cutting right through!

I sewed my fused flowers onto a bookmark made from pelmet vilene and gauze fabric - both coloured with Adirondack colourwash sprays in Espresso and Butterscotch. I beaded the flower centres with coppery blue 15 delica beads.


I used a slightly different flower shape for the reverse of the bookmark.


This was fun. I am attending a 2 day course with Margaret Beal in Chepstow Castle on 20th & 21st November and look forward to learning more about fusing fabrics and having more control!

Sunday 23 May 2010

A selection of ATCs

I usually forget to take pictures of ATCs, and share them here, even though I often make them! Here are just a few I have made recently.

The first set were made for a 'metallic embellishments' theme. The backgrounds are deli paper, sprayed with Starburst Stain colourwashes (actually overspray from other projects, I just line my spray box with paper to catch the spare spray, rather than waste it). I stamped the papers with Versamark embossing ink, then used detail gold embossing powder. The photo doesn't show the deep rich range of shimmering colour being set off by the gold, but if you click on the image you might see it in the enlarged version.


The heart and flowers are all made from metal mesh, punched and layered and attached with mini brads. The ATC on the left has a copper strip wrapped around it, with the word 'art' punched into it, and a leaf peel off above. The ATC to the right has a hammered wire embellishment with spirals at each end, and an etched metal charm wired to it.

The ATC below was a mini experiment - the base is thin canvas, painted with acrylic paint, then stencilled with gloss medium mixed with green PearlEx. The letters are die cut form gold cardstock, and the little butterfly is made from moulded polymer clay which had a layer of metal leaf added and rolled out to crackle before placing it in the mould.


This ATC has a light background made by using Starburst Stains on smooth watercolour paper. This was then stamped with a face stamp by Lost Coast, and masked using a sticky note cut to the same shape, before darker ink was sponged all around the central image. Once dry, the central image was masked again, and a numbers stamp from Paperartsy was stamped on top using Brilliance Moonlight White.


I'll try to remember to post my ATCs here more often!

Saturday 15 May 2010

Altered Element design project - polymer clay and circle frame

There was some Sculpey Studio polymer clay in this month's Altered Element Design team package. I haven't used this clay before, and I must say it is very user friendly. To condition polymer clay, so that it is nice and soft so it's easy to use, you need to know whether the brand of clay conditions through pressure or warmth. I ran this through the Wizard and it didn't make much difference, but putting the package into my bra for a few minutes (nice and warm n there!) helped considerably! Once warm, I kneaded the clay for a few moments before pushing it into a Krafty Lady silicone mould. Which is when I discovered the only pitfall with this clay - it's so soft that it is difficult to unmould. Every time I tried the frame distorted as it came out of the mould.

I know could have baked it in the mould, but I wanted to make several frames, and bake them all together. So, I put the mould and clay into the freezer for 5 minutes. That worked perfectly, the clay frame popped out of the mould without any distortion whatsoever. I baked the frame, and found that this clay has a pretty matte finish, but with slight sparkle.

However, the frame looked a little dull, so I gave it a quick application of 'whitefire' Treasure Gold. It looks lovely now, all I need to do is find a tiny image to put in the middle!


In the April design team pack there was some knitted wire tubing, which I couldn't find a use for. I had a little play with it, and found it stretches and shapes in interesting ways. I cut an inch of the tubing, and stretched it into a circle, which you can see in the picture below, along with the knitted wire in it's original state.


I painted the circle frame (from the design team pack) with white gesso, then stamped and embossed the raised 'frame' area with copper embossing powder.


I inserted the stretched and shaped knitted wire into the frame.


Finally, I added a moulded piece from my stash - it was just the right size and colour!


The other side of the circle frame needed to be different. I painted it with the deep turquoise Crafty Notions Spraypaque.

I stamped a texture stamp onto the raised frame, and embossed with gold. I made a dragonfly moulded disc using the Sculpey Studio antique gold polymer clay and a mould I bought in the US last year (Enchanted Gallery?) and painted the dragonfly body with acrylic paint. I gave the wings a quick coat of iridescent medium, then glued the piece into the frame and gave the disc and inner part of the frame a coat of acrylic wax to protect it.


Well, that's all the items in this month's Altered Element design team pack used in a range of small projects. Roll on next month, I'm looking forward to it already!

Guestbook

Blog Archive

Copyright

Please note that I assert myself as the creator of all art on this site (unless I credit another artist) and retain copyright of all artwork posted on this site