Sunday, 31 March 2013

Fantasy Film canvas

 So, a Fantasy Film themed swap.  I've used Fantasy Film many times, right? So why did I prevaricate for a month?  Who knows, but today the inspiration finally arrived - in the nick of time, it's the deadline for posting.

I painted a thin canvas with a mixture of micaceous iron oxide and purple fluid acrylic paint.  I coated it with PVA glue, and stuck two pieces of Fantasy Film down. Then I hit it with the heat gun, until it bubbled and changed colours, and started to become holey. It's hard to photograph, but the 3 images below give you some idea.


This is taken at an angle where no reflected light is visible.


This is taken at an angle where all you can see is reflected light.


I used impasto paste and a stencil to add texture down the left hand side.


I made a keyhole using air dry clay, painted with black gesso, coated with interference violet fluid acrylic. I rubbed copper Treasure Gold over the impasto and the keyhole.


I made a key from friendly plastic, painted to match the keyhole. I added a sticker ribbon, then used Brilliance inks to colour some paper, and stamped the words onto it with black Stazon. Hope my partner likes it!


Thursday, 28 March 2013

Heart felt

Shh, don't want to frighten her off by saying it too loudly, but I think my mojo has returned from her holidays...

Here is a wall hanging, made for a swap on the theme of 'heart-felt' - it had to include a heart made from felt. This is all needlefelted, some by hand, most by embellisher machine, with a little hand beading to finish it off.


Firstly, I embellished two layers of organza together, all over but just enough to hold them together.  One layer was a light shimmery blue, the other was a bluey green shot with a yellowy greeny gold.

I'm not sure you can see the difference in colour, but this picture has the blue side uppermost:


 This picture has the bluey green side uppermost. I like this side better, so this is the top.


I used two colours of merino wool rovings, this colour matches the background colour. I spread it out on my base, and embellished it in.


The colour of the other roving is a much brighter turquoisey blue. I am blending more of the blue into the green with each layer.


Added some more blended rovings.


I decided I had enough general texture, and needed something to take my eye around the piece.  I twisted some of the blue rovings together and embellished them onto the piece in a curvy line.


I added some silk tops to bring in some more colour and a shiny texture.  These are hand dyed by Oliver Twists. I love their stuff. It's probably a good thing they don't have a website, because I *only* spend about £50 a year on their goodies at shows.  If they had a website, I'm sure it would run into hundreds....


You might have noticed that the theme of this piece is 'heartfelt' and there's no heart?  I have not yet mastered the embellishing machine to a high enough level to create shapes, so I got the hand needle felting equipment out. I laid a thin layer of red rovings vertically, another horizontally, and the top layer was vertical again. I put a heart shaped cutter on top, and needled the layers together. It's quite therapeutic, you can relieve tension by imagining you're stabbing voodoo dolls while you're being creative!


I wasn't intending to finish the heart by hand, just to needle it enough so that I could lift it off the brush in one piece. I used a dull red, a brighter red, and then added some more silk rovings down the centre  for a bit of shine and a different texture.


Next, I embellished it onto the background, layering some gold 'angelina' I bought about 10 years ago, when I didn't realise you could buy angelina that didn't fuse together. I knew it would come in handy one day! It just adds  little subtle glitz.


 Just a bit more glitz needed, so I put the piece in an embroidery frame and beaded around the heart, and also onto the curvy line. 


All it needed to finish was to be mounted on gold mirror card, with a mountboard backing for stability. I added a little fine brass wire hanging loop, and put it into the jiffy bag to mail before I could change my mind and keep it....

Hope my partner likes it.

Friday, 8 March 2013

Monthly ATC swap - greens

Well, I forgot to take step by step pictures. This one also looks better in real life. The theme this month is 'Greens'.


Here's how it was done.  The base layer is card stock, sprayed with Adirondack colour mists in lettuce and pesto and a Sticky Fingers mist in grass green. This was over stamped with a couple of texture stamps using brushed sage Distress ink.

The next layer is acetate.  I used a bronze Viva Perle pen to draw random lines all over the acetate, and left it  to dry overnight.  I painted between the lines with glass paint.  This didn't work quite as well as I'd hoped, and I wanted more variation in colour, so I added some alcohol inks, which didn't behave at all as I expected. *Note to self - don't use alcohol ink over glass paint*.  I painted some areas with an acrylic glaze - on the back of the acetate.  I decided it would do, even though it was less of a stained glass effect than I hoped for.

I cut it all up into ATCs and it looked good, but there as nothing in particular to focus on.  I tried laying a number of things on top, but nothing grabbed me, so I set to making a bird cage.  The shape is trimmed form die cut name place cards found in the wedding aisle of Hobbycraft. I spent a while painting the little birdies, and then realised the bars would have to be in front of them.... I mixed micaceous iron oxide with green acrylic and painted the bars.  This didn't show up well, I realised it works better on larger areas.  I decided I needed shiny bird cages to go onto the shiny background.  3 layers of embossing powder later, I had nice shiny embellishments, which I added with a brad.

I don't plan my art very often, it usually goes where it wants to, but this one took more diverse paths than usual.

Sunday, 24 February 2013

Fragments ATCs

Made some ATCs today, on the theme of 'printed papers' - they had to have a background made of printed paper.  I stuck and old book page to my card backs, and sprayed with gunmetal and pearl colour mist sprays from Outside the Margins.  I added Golden black mica flakes around the edges, and used a diamonds stencil to apply Golden micaceous iron oxide down one side. I added some dots to add texture and dimension, using a pearl pen.


So far, so good.  I then made, and tried out, a whole series of embellishments on the ATCs, and none of them worked. I thought an image might work, but I have no long tall stamps, and none of the images in my collection are that shape either.

 So I stamped a swirly pattern down the right hand side to see if that would help. It looked better.  I tried a whole bunch of other things before settling on pieces of shrink plastic - fragments of images on one, fragments of text on another, and fragments of numbers on the last one. Works for me....


Monday, 11 February 2013

Doors ATCs

The theme for my monthly ATC swap was "doors and what's behind them."

Here is the front of the ATC I created:


The front of the ATC, the door itself, is made from scraps and odds and ends of sticks of friendly plastic.  I just cut all my scraps into smallish pieces and laid them all out onto a craft sheet, as close together as I could get them. I took another craft sheet and laid it on top, and ironed them until they melted together into a an A4 sheet approximately half the thickness of a friendly plastic stick .  I guess you could use a skillet for this if you have one, but your sheet would be thicker.  There were small gaps, so I added some more pieces of friendy plastic and ironed again. 

I then used a Spellbinders ATC die and my Wizard to cut ATCs form the sheet of friendly plastic. I rubbed the ATCs all over with olive bronze Treasure Gold, to hide most of the mixture of colours of friendly plastic. Each ATC was then laid onto the craft sheet, heated with a heat gun, and stamped into with the diamond patterned stamp (Invoke Arts).  I allowed the friendly plastic to completely cool before removing the stamp, and added more olive bronze Treasure Gold to give good coverage, then used renaissance gold Treasure Gold to highlight some of the raised areas. I punched a hole, then added a bead cap and brad to make the door handle.

Here is the what's behind the door:


The door is hinged with organza - the friendly plastic was carefully heated down one side and the organza was pressed into the warm plastic.  I then cut pieces of very thin wood sheet (maybe this is marquetry veneer?) to size, inked them to age them, and stamped them using the same stamp as the front of the door, before sticking them to the friendly plastic with red liner tape. The other part of the organza hinge was trapped between two layers of card stuck together with red liner tape.

The backgrounds of the inside were created using the layered paint technique as detailed in a previous blog post.


I cut this background into ATC sized pieces, stamped the words onto some paper from a very old book and glued them onto the background with gel medium.

Why 'Pieces of History'? Well, all the elements of the ATC are pieces of my history.  The friendly plastic was all left over from other projects.  The layered paint technique was learnt at Art & Soul during a fantastic trip to the USA back in 2007, which is part of my history.  It was painted onto a base of cardboard bpxes which used to contain one of my favourite smoothie ice lollies, and the book pages used for the words are from an old book which I have had for a long time, again part of my history.

Thursday, 7 February 2013

Distress Ink tags

I made some tags for a swap. I was really pleased with them, so I thought I'd put a short tutorial here on how they were done.


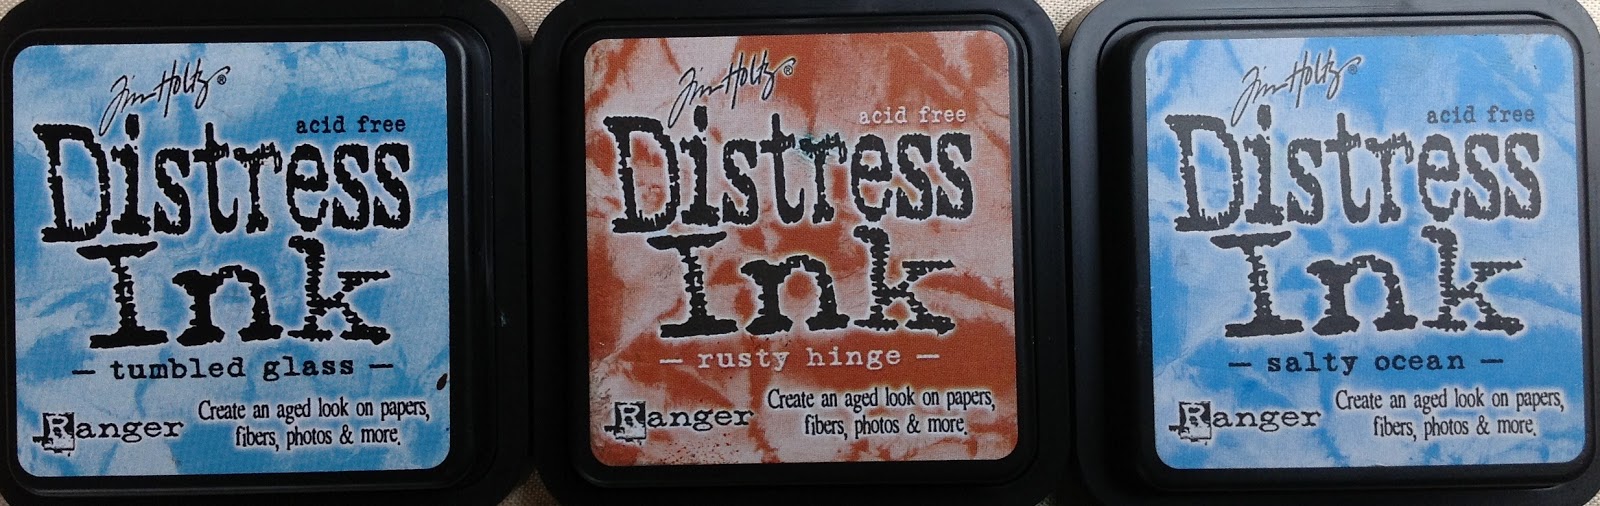
I used these 3 colours of Distress Ink, plus Walnut Stain.


Firstly, I used the ink application tool with sponge to apply a layer of the lighter blue, and some of the rusty hinge. I added the darker blue round the edges.  I ran two tags through my Wizard in a Cuttlebug folder, then used a stencil on the other two - one has moulding paste applied, the other was inked through the stencil  - I used all 3 colours of ink for this.


I added more ink to the raised areas of the two embossed tags,mainly rusty hinge but also some of the darker blue,  and stamped the stencilled tag to add more 'texture'.


I inked up the tag with moulding paste, again using all three colours of ink.


I didn't neglect the backs of the tags, the embossed tags were just inked with the rusty hinge, the other tags were inked with all 3 colours, and stamped with a distressed paisley stamp in the darker blue.


Finally, I added depth and texture by applying Walnut Stain ink around the edges, and sprinkling with Detail Clear embossing powder, and heating with my heat gun.  I wanted the effect to be subtle, so I rubbed some of the embossing powder off with my finger before heating - this made it thinner in some parts than others, and also blurred the line where the embossing powder finishes.

I created some backgrounds using the tag card and inks, and stamped them with the lighter blue ink and the same textured background stamp as the tags, before stamping Leonardo images onto them, and adding more of all 3 inks with the applicator tool.  I stamped some words onto offcuts. I layered the images onto very thin layer of wood, which I had coloured using the same ink, then added to the tags with the words.  I only have 3 Leonardo stamps with the right size images for the tags, so the last tag has a panel with some stick on letters spelling Da Vinci.
  

Close up of the front of the assembled tag book.


Sunday, 30 December 2012

Alphabetica Y - layered paint tutorial

About 5 years ago I took a class 
with Ann Baldwin at Art & Soul, in Portland. Ann has been moving from painting to photography, and her photography is interesting but I prefer her paintings. Perhaps when she's been doing photography for as long as she's been painting, I'll like the photography as much as I like the painting!

Ann paints beautiful paintings by layering acrylics - sometimes 45 or more layers. She adds texture by adding papers and other media and textured elements between the layers. I decided on a simple version of what I learnt for Y.

I took some scrap cardboard, and painted in with a thin layer of gesso. 


I gave it a second thin coat.


I got out some gloss gel medium, and a palette knife


Once I'd coated the card with gel medium, I added texture with cookie cutters, a rubber stamp, the wrong end of a pencil and a mini mister cap.


I let it dry.  You can only tell if it's dry by touching it.


I got my paints out - these, and every yellow I have. I love these paints, the colour is still strong, even when thinned with water, or applied in thin layers.


Using my brightest yellow, I painted the hearts. This may look a bit like fried eggs at the moment but it will improve, honest!


I gave it a coat of Nickel Azo Yellow. Transparent colours are best for this technique, but you apply the paint so thinly that you can get away with less a transparent layer every now and then.


I gave it a coat of Transparent Yellow Iron Oxide..


I took my paintbrush and went around the hearts with a thin layer of Yellow Ochre. This was still a very thin layer of paint, but I added some uneven-ness by painting some areas more than once.


I added a touch of red for contrast - I made a mask then stamped each heart with a dotty stamp and red Stazon.


Doesn't look like fried eggs any more, I'm starting to like it now.


Next, I stamped some words over the spots - big improvement - and then painted some of the circles with Iridescent Bronze. This is very bright, but it will mellow when there are some layers of transparent paint on top.


I added a layer of Nickel Azo Yellow. See how those bronze circles have warmed up?


Another layer of Nickel Azo Yellow. I like this - it could get much richer with more layers and the introduction of other colours, but this peice has to be Y for Yellow, so I'd better stop. There are about 10 layers of paint here.


The back, though, well that's another matter.  I'd done everything so far (apart from the red spots)  to another piece of card to be the back of the piece.

I added layers of Nickel Azo Gold, Transparent Burnt Orange, and Transparent Iron Oxide Red.  I painted some of the gold hearts with Turquoise, very thinly. I layered in Iridescent bronze at different points so there would be different colours of gold in the piece. It looks like rich leather.


This is similar, but more deep colours added - about 17 layers of paint here.


You can make it brighter, depending on which colours you use.  Somewhere in the middle of this, there was a Turquoise layer, which turned the yellowy areas green, and the reddish areas slightly greeny browny.

This is a really easy technique which produces really rich surfaces with lots of depth and deep shine.  The trick is just to have patience, and take the time to paint many layers but keep the layers really thin, and to make sure each layer is completely dry before adding the next (use a heat gun if you're as impatient as me!).


Guestbook

Copyright

Please note that I assert myself as the creator of all art on this site (unless I credit another artist) and retain copyright of all artwork posted on this site