Showing posts with label Opals embossing powder. Show all posts

Monday, 17 November 2008

Experimental ATCs


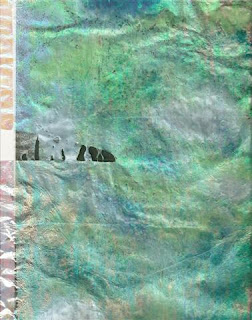
An ATC for a swap with the theme of 'Experimental'. I made some background paper by laying a nappy liner (brands which work are Gerber in the US or Boots own brand in the UK) onto a sheet of non stick baking paper, the sprinkling small pieces of Fantasy film and snippets of Angelina fibre all over it. I then sprinkled Opals embossing powders in pinks and blues onto the nappy liner, covered it all with a second nappy liner and another sheet of non stick baking paper, then ironed it all with a hot dry iron. You can see the Opals melting, and can 'move' the liquid embossing powder with your iron. Wait until cool, peel apart. you can add more embossing powder, fantasy film or fibres at this point, and re-iron if you do.

The Opals melt into the nappy liner and the nappy liner will start to melt into holes, so be careful not to iron it all for too long! When you peel it apart it may not look too inspiring, but if you give it a quick blast with your heat gun, the surface will become shiny. You end up with a flexible sheet that you can use in a variety of projects.

I adhered this Opals paper to some lilac pearlescent paper using gel medium, then cut it up and layered onto ATC sized card.

The butterflies are made form tyvek. You can get tyvek 'paper' and tyvek 'fabric'. They both work, but the fabric is much easier to use for this technique and gives a more flexible result. I took a butterfly stamp, painted a piece of tyvek with watered down lumiere paint, cut it into pieces, and laid each piece on the stamp, covered with non stick paper and ironed it. The tyvek melts quite quickly so you have to keep a careful eye on what you're doing!

I peeled the tyvek off the stamps, and cut around the butterflies. The body is gold dimensional paint, left to dry overnight, then coloured with Treasure Gold in Royal Amethyst. I made some tine antenna from gold wire, and added those before finishing the ATC with a gold sun charm, and a stripe of Golden's gold mica flakes small.

Saturday, 25 October 2008

Opals embossing powder & ironing

I have wanted to play with Annette's 'Ironed Opals' technique for some time, but don't have anywhere to buy the Vilene stuff Annette uses. I'm also not quite sure which Vilene product it is. Today, I decided not to let that stop me experimenting, so I tried the technique using what I have at home. I bought some nappy liners a long time ago, but could never make them go into interesting holes (which is what I had bought them for!!!). Today, I laid a nappy liner on a piece of non-stick baking paper, then laid a sheet of iridescent gift wrap on top, then sprinkled with Opals, added another nappy liner, plus another layer of non stick paper, and ironed the whole thing:


You can see the gap half way down on the left where there was no gift wrap. The nappy liner behaves differently when there is nothing to stabilise it.

So, I tried just using 2 nappy liners with a layer of Opals between them:


The Opals fuse the nappy liners together, and if everything gets hot enough, the nappy liners start to make holes. When you peel the Opals sheet from the non-stick paper, it is not very shiny. A quick blast from the heat gun brings back the shine. It also makes more holes, and enlarges holes made whilst ironing. It's a balance between getting the shine back and not destroying the whole piece!

Next, I decided to try and stabilise the nappy liners by adding scraps of gift wrap, and sprinkling snippets of metallic fibres over the 'sandwich filling' between the nappy liners. And I like the 'fabric' of this best (not so sure about the colours LOL):


The scraps of gift wrap stop holes appearing in the nappy liner, so do little piles of the metallic fibre stuff, cut into short lengths. The metallic fibre is something I bought from BitsNPeices4U in the belief that they might be fusible fibres (which they are not). Click on the pictures above for more detail.

Thursday, 17 January 2008

Charming

I am involved in a charm swap - I have never
made a charm before, and this is what I came up with.

These are washers from the hardware store,
painted with acrylic medium, then red acrylic ink.
I created some loops from fine
brass wire (off a rioja bottle!),
then added punched hearts,
and gave the charms a couple of layers
of Opals Franklin, which holds it all together,
seals it and gives it a nice shine!

Sunday, 9 September 2007

New background idea


I needed a raspberry-related background
(don't ask, LOL)
and also wanted depth and glossiness,
so decided to play with some of my supplies
and some kitchen foil.

Of course, the scan doesn't show the glass-like appearance,
or the depth of colour,
so you will just have to imagine those elements!

To make something similar to the above background,
take some good quality kitchen foil and crumple it up,
then spread it back out without flattening it too much.

Paint it thinly with 3 or 4 acrylic paints - you can
allow to dry between layers or just slap it on,
but paint thinly, and don't cover the raised parts with paint.
I used Stewart Gill paints.

Add a layer of Opals heavy embossing powder -
Franklin, and before it sets sprinkle some texturising elements
on - I used Stewart Gill Byzantia Gilding Chips & Bijou Blends
and also some Glitterati fibres then added another coat of
Opals Franklin. It was looking pretty good at this point,
but didn't have enough 'depth' or zing.

So I added some more colour by applying
Ranger alcohol inks in Wild Plum, Cranberry & Raisin.

Perhaps if I try this again (and I think I will!)
I won't use paints as the base layer,
but will use alcohol inks direct to the foil
and see how much depth of colour I have.

I haven't tried cutting this into pieces yet,
but if it cracks when I do, I am sure a quick
blast of the heat gun will mend it!


Thursday, 24 May 2007

Personalised ATC swap

I just completed a 'Personalised ATC' swap,
where each swapper listed 3 things they love,
and their swap partner incorporated these
things into the ATCs they make & send.


Rhonda in Australia was my partner for the swap, and she chose:
'textured backgrounds', 'fantasy film', and 'friendly plastic'.
I hope she likes the resulting ATCs!

The one on the left was made by adding a couple of layers of Opals embossing powders and heating, then putting a layer of fantasy film on top and stamping into it while it was all still hot, finally adding a friendly plastic sun embellishment.

The middle and right hand ATCs are both Opals embossing powders, stamped into while still hot, with friendly plastic embellishments.

Guestbook

Copyright

Please note that I assert myself as the creator of all art on this site (unless I credit another artist) and retain copyright of all artwork posted on this site