Saturday, 27 December 2008

IT girl for Jessie

One of the yahoo groups I am in is running an 'IT' girl swap. Each month everybody makes a gift for the member who is the 'IT' girl for that month, and who sets the theme. Jessie's theme is 'TIME', so what could be more appropriate than a clock?


I took inspiration from Diana Twedt, whose work I love. She often creates frames using foam board and scraps of paper.

The clock is made from foam board, covered in brown paper, then scraps of textured papers. I painted it with black gesso, then gave it two coats of Golden's iridescent copper paint, before rubbing it with several colours of Treasure Gold, and giving it a good polish with a dried out baby wipe to shine it up.

I then added the clock fixings, and some small black gems to act as 'numerals'.

The picture below shows the detail a little better:


I hope Jessie likes it.

Tuesday, 23 December 2008

A few ATCs

A few ATCs I have made for swaps:

The theme was chinese proverbs. I used pre printed mirror card, coloured red with alcohol ink. The central panel was black glossy cardstock with an image stamped and gold embossed, and finally the proverb was printed onto copy paper and edged with red.


This was for e 'flight' theme. The background is a photo I took of the landscape in mid Wales, the foreground is a digital collage I made and printed onto a transparency.


This ATC was for a 'techniques' theme - the background is stamped with gold Brilliance ink on glossy white card, then rubbed over with eggplant and cranberry dye inks. The image is a piece of fantasy film, which has been ironed onto an inked stamp.


This was done for the 'jigsaw' theme. The background is cardstock painted with Golden iridescent copper paint, then stamped and embossed using a grungy number stamp. the small jigsaw piece was painted with Golden micaceous iron oxide, and dotted with an Inkessentials white pen, before being mounted onto a piece of folded card which opens out so that you can see the following quote:

There are no extra pieces in the universe. Everyone is here because he or she has a place to fill, and every piece must fit itself into the big jigsaw puzzle. (Deepak Chopra)


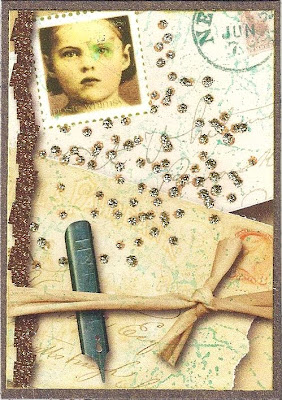
This is another digital collage, with some stamping and glitter on top - the theme was 'postal correspondence'.

Sunday, 14 December 2008

Beadazzled swap

I am in a swap where beads had to form part of the item - I considered making a small beaded paper quilt, but in the end decided to make jewellery.

The necklace is a piece of fine memory wire, with some seed and bugle beads and a large disc of jasper, and the earrings use the same seed beads and small pieces of jasper. The large jasper disc is a bit darker than it looks on the photograph.

All the beads were from a 'Tropical Surf bead soup' box from Beverly Gilbert, whose class I took at Art & Soul last year. Beverly is a fabulous bead artist and a great teacher, I recommend her classes highly.


This is whizzing around the world to Australia, where I hope Trizzy likes it - I thought the colours would suit her!

Sunday, 30 November 2008

Cuttlebug swap

I am in a swap where an element of the swap item must be made using a Cuttlebug folder. I made a card!! This is getting to be a habit - no cards for months then 3 in the last week or two!


I sprayed some watercolour paper with Outside the Margin's Tungsten Carbide and Granite Luster colour washes, and another sheet with Gold. I ran the darker sheet through my Wizard
in a diamond patterned Cuttlebug folder. I also sprayed some tags to match the darker paper and ran those through the Wizard in the same Cuttlebug folder.

I attached 3 gold charms to the tags, attached the tags to the gold card with gold brads, and attached the gold card to the dark card with double sided tape.

A simple card which looks rich and textured.


Paper quilt

I have been working on an idea for a birthday gift for my friend Maggi. It has been slooshing around in my brain for a couple of weeks, but it didn't start coming together into a piece of art until yesterday. Sadly, I am now very late for Maggi's birthday, but as she likes to extend her birthday, I hope she won't mind too much!!!


I began by using colourwash sprays on several sheets of Fabriano cold press watercolour paper. I love how this paper absorbs the colours and seems to glow, it may be more expensive than others but I think it's worth the extra cost. One of the sheets came out a lovely pale coppery colour, with steely blue and slightly gold areas. I used this as the base for the piece, which is around A4 sized.

For the top and bottom embellishments, I punched small flower shapes out of a deep red and gold background paper, then cut some coppery bronze organza and layered it over both punched pieces and used brads to hold the fabric and paper in place. I gave the black brads a little touch of copper Treasure Gold to tone them down before I used them.

The circles down the side are the same deep red paper, run through a different cuttlebug folder, and with 2 layers of flower shapes punched from deep black/gold cardstock added using brads.

The horizontal piece under the circles is the same deep red background paper with little metal beads and sequins added. I coloured the metal beads with 'rust' alcohol ink and Treasure Gold in copper and indigo, then attached them to the paper with fine copper wire.

The small squares with hearts are the same paper, overstamped with gold ink in a tile pattern. The hearts are shell buttons and I attached them to the paper with fine copper wire, adding a small bugle bead to cover the holes. I added a couple of the paper flowers I had punched out of the top border to fill the gaps between the squares.

The large heart is made from Hearty air dry clay, painted with black gesso, then rubbed with indigo, ruby and copper Treasure Gold. It is mounted on a torn piece of darker steely blue & tungsten watercolour paper, which I ran through the Wizard in a cuttlebug folder with a diamond pattern. I stamped small text on the paper before adding the heart.

The piece above the heart is the last of the deep red background paper. I sprayed some white tags with colourwash sprays, then ran them through the Wizard in a brocade patterned cuttlebug folder. I added Treasure Gold in copper, gold and sapphire to add colour and give them depth, then added a small charm to each using fine cotton thread. For sequins glued to the corners added the final touch.

The final and largest element of the piece was made by stamping charcoal coloured Xpandaprint onto an interesting paper bag, then heating with a heat gun to make the Xpandaprint bubble up. I rubbed this carefully with gold and copper Treasure Gold, and mounted it onto some more of the steely blue watercolour paper, which I also stamped with text.

I am really pleased with this piece, I am tempted to frame it and keep it myself, I hope Maggi likes it!!!

Sunday, 23 November 2008

Burgundy & lime skinny page

What a colour combination - it's WAY out of my comfort zone!!!! I apologise for the scan quality - my scanner hates anything with dimension.


For this side of the page, I adhered green tissue over green cardstock, then stamped some text using deep red ink. I added a piece of burgundy coloured ribbon, which was sheer with flocking - I thought it added interest and texture. I took some hot press heavy watercolour paper, and spritzed it with several red colourwashes, then gave it a coat of Tulip non permanent glitter, then a final spray of Adirondack raisin colourwash.

I dried the cardstock, cut it into pieces, and ran it through the Wizard in a Cuttlebug folder. For the light green embellishment, I spritzed some Stampbord with water, then zapped it with a Milwaukee style heat gun, and the combination of heat and water created little bumps. I painted it with acrylic ink, then stamped it using Crimson Copper
Brilliance ink, and embossed it with clear embossing powder.


For this side of the page, I adhered coloured deli paper. I had sprayed this green using Lime Jello colourwash spray from Aileen. I stamped over the top of the green paper using chalk ink and a texture stamp from Hearts in Touch.

I made some gauze 'paper', something Jessie told me about:

Take a melamine tray, and lay a sheet of silicone baking paper on it. Lay a sheet of cling film/saran wrap on top, then a sheet of gauze (or scrim) on top of that. Spritz the gauze lightly with Johnson's Klear/Future floor polish - just enough to dampen it, not enough to make it soggy. Move the gauze around on the cling film with your fingers until you have an interesting collection of ripples and rucks in the fabric. Next, spray with colourwashes (usually more than one colour, and they blend into one another beautifully, but for this project it had to be burgundy so I used Ranger Adirondack raisin).

Finally, lay another sheet of silicone baking paper over the top, lift the 'sandwich' off the tray, and lay it on a heatproof surface and iron the whole thing using a hot dry iron. The liquid polish and colour will sizzle and hiss, but the piece will dry, and the heat will also fuse the gauze to the cling film/saran wrap, leaving you with a 'paper' which can be adhered to your artwork using double sided tape or gel medium. It can also be die-cut or punched.


I added some gauze to the left hand side of the page, and die cut some flower shapes form the offcuts of the watercolour paper I used earlier. I die cut some circles form the lime green background offcuts, and stamped a little girl's face on them. I die cut some smaller flowers from the gauze, and added the embellishments to the page using gel medium.

Monday, 17 November 2008

Experimental ATCs


An ATC for a swap with the theme of 'Experimental'. I made some background paper by laying a nappy liner (brands which work are Gerber in the US or Boots own brand in the UK) onto a sheet of non stick baking paper, the sprinkling small pieces of Fantasy film and snippets of Angelina fibre all over it. I then sprinkled Opals embossing powders in pinks and blues onto the nappy liner, covered it all with a second nappy liner and another sheet of non stick baking paper, then ironed it all with a hot dry iron. You can see the Opals melting, and can 'move' the liquid embossing powder with your iron. Wait until cool, peel apart. you can add more embossing powder, fantasy film or fibres at this point, and re-iron if you do.

The Opals melt into the nappy liner and the nappy liner will start to melt into holes, so be careful not to iron it all for too long! When you peel it apart it may not look too inspiring, but if you give it a quick blast with your heat gun, the surface will become shiny. You end up with a flexible sheet that you can use in a variety of projects.

I adhered this Opals paper to some lilac pearlescent paper using gel medium, then cut it up and layered onto ATC sized card.

The butterflies are made form tyvek. You can get tyvek 'paper' and tyvek 'fabric'. They both work, but the fabric is much easier to use for this technique and gives a more flexible result. I took a butterfly stamp, painted a piece of tyvek with watered down lumiere paint, cut it into pieces, and laid each piece on the stamp, covered with non stick paper and ironed it. The tyvek melts quite quickly so you have to keep a careful eye on what you're doing!

I peeled the tyvek off the stamps, and cut around the butterflies. The body is gold dimensional paint, left to dry overnight, then coloured with Treasure Gold in Royal Amethyst. I made some tine antenna from gold wire, and added those before finishing the ATC with a gold sun charm, and a stripe of Golden's gold mica flakes small.

Saturday, 15 November 2008

Image transfer card

Well, I didn't make a card for months, and then I made two in a week!


This card is for Jenny, and the lady on the front is an image transfer created from a simple digital collage. I found a picture of some lace on Google, and worked on it in Photoshop Elements. I removed the background with the magic wand tool, then changed the colour of the lace. The lady is a copyright free image from Art-e-zine, and I changed the colours to be blue hues, and then layered her over the lace background and printed. I smeared the print with a thin layer of regluar matte medium, and smeared a piece of linen with a similar thin coat, then ran the paper and fabric threough the Wizard, twice.

I layered the transfer onto pearlescent blue card, duck egg blue matte card, and then onto the main background, which is stamped and embossed pearlescent blue card. 3 little start charms finished it off nicely!

Fiona's IT girl gift

Layers of watercolour paper, coloured with colourwashes,
some embossed in Cuttlebug folders.

I combined the papers with gel medium image transfers onto linen,
ribbons, organza, sequins and beads to make a paper quilt.
Inspired by Beryl Taylor.....

I hope Fiona likes it!

Wednesday, 12 November 2008

Image transfer card

This is a card I made for an image transfer swap on CCSwaps. I haven't made a card for months. The botanical image was transferred to a piece of linen by printing the image onto Epson double sided matte photo paper, then smearing both the image and the fabric with a thin layer of Golden regular matte gel medium, and running the paper and fabric through the Wizard.

I am finding this method for creating image transfers is pretty reliable and works well onto fabric, gessoed mount board, watercolour paper...


I layered the fabric image transfer onto watercolour paper, then onto embossed card (used the 'distressed stripes Cuttlebug folder for this), and then again onto more watercolour paper. The papers were coloured with pesto and butterscotch colorwashes, and I used small scraps with brads and ribbon to make the embellishments above and below the main image. The whole thing was layered onto green cardstock.

Tuesday, 11 November 2008

And now for something completely different

I am making a gift for Fiona, based on the theme of 'Inspiration' - whatever inspires me as an artist. It has been hard for me to think of one thing or person that inspires me, as I draw inspiration from all sorts of places.

So I put that to one side, and started working on another swap - an image transfer swap Annie, and then I found my inspiration LOL


I am inspired by Beryl Taylor's work. She makes beautiful wall hangings from watercolour paper and fabric. But the thought of all the sewing puts me off. So, I decided to see if I could create something based on her work with less sewing and no fabric. I'm delighted to say the watercolour paper held up well!

I used colourwashes in greens (Annie's favourite colour) for the background, with splashes of autumnal golds, on torm pieces of heavy watercolour paper. I used 2 gel medium onto fabric transfers, and layered the papers and fabrics together with gel medium. I added brads to one strip of paper, and eyelets to another, then sewed beads and sequins onto ribbons through the watercolour paper. I'm quite pleased with this, and now I have the process sorted out, I'll make a start on Fiona's!!! Thinking mainly turquoisey blues with a touch of hot pink or purple...

Watch this space!

Friday, 7 November 2008

Lutradur ATC


This ATC is made using lutradur. The lutradur was charcoal coloured, so I added some subtle gold tones using a colorwash spray, then used a stencil and Xpandaprint to create the fern. Xpandaprint is something where less is definitely more. If you use too much, when you heat it, you have mountains instead of subtly raised bobbled texture. I coloured the fern with Treasure Gold wax rub ons, then used a hot marks tool melt a squiggly pattern into the lutradur. I adhered it to a dark gold cardstock using matte gel medium, and added the dragonfly charm. Finally, I punched a couple of small holes and threaded beaded wire through them.

Friday, 31 October 2008

Shrink plastic playtime

I've been playing with shrink plastic. Please excuse the awful scans, my Hewlett Packard all in one scanner, copier, printer doesn't like scanning anything which isn't completely flat.

I shrink all my shrink plastic on a thick wooden board. If you shrink it on top of paper, it will probably stick to your paper half way through the process and you'll never get them apart!!! I think a craft sheet base is also good.

Lots of people have trouble with shrink plastic, I used to when I used the Milwaukee type heat gun and I don't have any trouble since switching to the 'hair dryer' style of heat gun. I also take the heat away once the plastic starts to 'move' and bring it back to specific spots to try and control the process. If it starts curling, aim the heat to the underside of the curl and it will curl back and flatten out. If you do this throughout the shrinking process, it is unlikely to curl enough to stick to itself. When you think it;s finished shrinking, if it's not flat enough for you, you can use a pallette knife to flip it over and give the back a bit of heat. Flip it back, and if it's still not as flat as you'd like, lay an acrylic block on it and leave it to cool under the block - if you press, you will also squash the plastic and it can go out of shape.

Remember when adding colour to shrink plastic that it intensifies hugely and often darkens as the plastic shrinks. If you lightly sand the shrink plastic before colouring, it 'grabs' the colour better. Use a nail buffer or the sanding blocks Lucky Squirrel sell for the purpose, or very very fine sandpaper. sand one way, then again at 90 degrees, so the sanding is 'cross hatched'. If you want your shrink plastic to have holes in it, or a particular shape, cut it out before heating, as you won't be able to cut it afterwards.

If you want all over colour, add just enough that you can only just see the colour, and you will probably find you've added more than you planned once shrunk! You can use chalks (probably the best think to colour clear shrink), colouring pencils (good for background colour), pigment inks (good for background colour and images, but pretty opaque), Brilliance inks (good for everything, but need to dry overnight for images), Stazon (great for images).

Remember, you can click on the images to see larger versions showing more detail.


This pair of ATCs use 3 different colours of shrink plastic in 3 different ways. The ATC on the left has embellishments made from clear shrink plastic, stamped on with Galaxy Gold brilliance ink (and left overnight to dry - this ink is marvellous on shrink plastic but it really needs that drying time). The colour is added on the same side as the images, also Brilliance ink (but you don't need this to dry before shrinking, as it doesn't matter if it smudges. Shrink, and edge with a Brilliance ink.

The ATC on the right has a randomly shaped left over piece of black shrink plastic (although colour probably doesn't matter here) which I coated with a pretty thick coat of Stewart Gill Pearlise (Black Pearl) . This technique works will all Stewart Gill paints, I haven't tried it with other fabric paints, and it doesn't work with ordinary acrylics, as far as I know. It's something to do with the binder in the paint, I think. Anyway, once the paint is on, just heat and shrink (more carefully and slowly than usual, in stages if necessary, you want it to curl as little as possible). The paint ruffles and creates an 'encrusted' texture on the surface of the shrink plastic. The texture also has some shimmer, which means if you get your colour combinations right, it can look like bronze which has been under the sea for centuries...

The other piece of shrink plastic was white, but I added some ochre pigment ink to soften the background colour, then stamped the image with black Stazon ink. This is is fantastic for using with shrink plastic - it dries very quickly and is permanenet, so great for images.


This dangly decoration design is based on a lovely gift Maggi sent me. She made hers in paper, I decided to try it in shrink plastic. I used clear shrink plastic, and stamped all images with black Stazon. I added background colour using Colorbox pigment inks. The smallest squares were punched using an inchie punch, the others were careful measured and cut squares. It's all 'Lucky Squirrel' brand shrink plastic, and I wasn't careful to keep the orientation of the shrink the same after I had punched. The shrink plastic shrinks ever so slightly more in one direction than the other, so my carefully measured squares have come out as diamond shapes. No problem with that, but I would have liked it if they had all been short and fat or tall and thin. I will make another, ensuring I keep all the shrink the same way up!

I have noticed that tall oblong pieces often shrink into parallellograms, or shrink 'off square', and squares often turn into diamonds. I wish they'd invent a shrink plastic which shrank in completely true proportion to the original. This effect shows more and more the larger your piece is. So if you don't want it to be noticed, work with pieces which are less than 2 inches in any dimension before shrinking!

Saturday, 25 October 2008

Opals embossing powder & ironing

I have wanted to play with Annette's 'Ironed Opals' technique for some time, but don't have anywhere to buy the Vilene stuff Annette uses. I'm also not quite sure which Vilene product it is. Today, I decided not to let that stop me experimenting, so I tried the technique using what I have at home. I bought some nappy liners a long time ago, but could never make them go into interesting holes (which is what I had bought them for!!!). Today, I laid a nappy liner on a piece of non-stick baking paper, then laid a sheet of iridescent gift wrap on top, then sprinkled with Opals, added another nappy liner, plus another layer of non stick paper, and ironed the whole thing:


You can see the gap half way down on the left where there was no gift wrap. The nappy liner behaves differently when there is nothing to stabilise it.

So, I tried just using 2 nappy liners with a layer of Opals between them:


The Opals fuse the nappy liners together, and if everything gets hot enough, the nappy liners start to make holes. When you peel the Opals sheet from the non-stick paper, it is not very shiny. A quick blast from the heat gun brings back the shine. It also makes more holes, and enlarges holes made whilst ironing. It's a balance between getting the shine back and not destroying the whole piece!

Next, I decided to try and stabilise the nappy liners by adding scraps of gift wrap, and sprinkling snippets of metallic fibres over the 'sandwich filling' between the nappy liners. And I like the 'fabric' of this best (not so sure about the colours LOL):


The scraps of gift wrap stop holes appearing in the nappy liner, so do little piles of the metallic fibre stuff, cut into short lengths. The metallic fibre is something I bought from BitsNPeices4U in the belief that they might be fusible fibres (which they are not). Click on the pictures above for more detail.

Tuesday, 7 October 2008

Christmas presents


I have been busy making 24 Christmas presents for the 12 days of Christmas swap on CC Swaps yahoo group.

I won't spoil the surprise for the recipients by posting pictures of what I made, but I was so pleased with the way they looked when I'd finished wrapping them (never my strong point LOL) that I thought I'd share that here.

For the smaller presents, I sprayed mulberry or silk papers with colourwash sprays, and for the larger flatter gifts, I crumpled brown paper up then sprayed each sheet with 3 colours of Radiant Rain. A quick handmade tag and tied it all up with soem interesting balck yarn to add drama. I hope the recipients realise that the wrapping is part of the gift, to be used in their art!

Saturday, 27 September 2008

Stamp versatility swap

The idea of this swap was to explore how the same stamp can be used to create different 'looks'. We each had to create 3 cards or ATCs using the same stamp in different ways. here's my take on it, using a stamp by Invoke Arts:

Background - Reynolds freezer paper used in a 'spray box', which has accumulated overspray from previous projects on non-plasticised side. Adhere to cardstock using gel medium.


Embellishment - heat fun foam with a heat gun until it begins to curl, stamp into fun foam and hold the stamp down as hard as you can for about a minute, until the foam cools. Remove stamp, cut around image. Paint the fun foam with 2 coats of a paint intended for fabrics - I used Stewart Gill, but Lumieres would be fine. Once dry, gently rub some Rub'n'Buff or Treasure Gold over the raised areas to highlight them. Adhere to the background using glue dots.


Background - cover cardstock with small pieces of metal tape, burnish, then use a Ten Seconds Studio metal roller tool to add texture. Rub with Rub'n'Buff or Treasure Gold to dirty it up a bit, then add colour with a Brilliance Inkpad.

Embellishement - fold a piece of Fantasy Film (ART Glitter Institute) or Glitterati (Stewart Gill) in half and put into a hot laminating pouch. Laminate, then stamp image using Stazon ink. Cut around image once ink is dry, and adhere to background with gel medium. The scan doesn't show the iridescence that is visible in real life.


Background - coat the card with Golden Iridescent Copper paint. make fabric paper - lay a thin cotton fabric (muslin in the US, 'lawn' in the UK) onto a plastic sheet, coat with diluted PVA glue - the cheaper the glue, the better. Add pieces of thin gift wrapping paper, leaving gaps between, coat with more diluted glue, add a sheet of white tissue paper, smooth down, add more diluted glue, and while the glue is still wet, add very diluted Golden fluid acrylic paints (other acrylics will also work, but diluting them until they are the thickness of ink may render some cheaper paints fairly colourless as they don't have enough pigment). leave overnight to dry. Overstamp with Brilliance ink - I used Cosmic Copper and a Stamp Camp stamp. Glue to felt using PVA glue, cut to size, adhere to cardstock and edge with 3 dimensional paint, which gives a 'faux solder' effect.

Embellishment - lightly colour some translucent shrink plastic with pigment ink, stamp image using Brilliance ink - I used Pearlescent Olive. Leave overnight to dry. Cut around image, shrink with heat gun, adhere to fabric paper with glue dot. Take a small metal tile, colour with alcohol inks, edge with copper tape, stamp part of image with Stazon, adhere to fabric paper with glue dot.

I had lots of fun experimenting, playing with techniques old and new, and combining techniques. I hope the recipient likes the results!

Monday, 22 September 2008

Lutradur

I went on a course at Gallery Textiles with Annie, to learn about Lutradur. I had purchased a sheet of Lutradur last year but didn't have the confidence to play with it in case I "ruined" it. Now I know that "ruining" it is one of the fun things to do with it!!!

Lutradur is a lightweight polyester fibre substance which responds to heat by melting, and which can be coloured in a range of ways. It can also be printed on (but the images will be ghostly rather than dark and crisp), or have toner based images and text transferred onto it with acetone. Colour can ba added using transfer dyes or even colourwashes or paints, but these may not react in quite the way you expect as the lutradur doesn't actually absorb the wash or paint, this wraps itself round each fibre and clings to itself. And you cna't hurry the drying, because heat melts Lutradur!

The piece below was stamped with Xpandaprint (sometimes called dimensional fabric medium) using a foam stamp. I learn that less is more with this stuff!


Once stamped, if you carefully heat, the Xpandaprint bubbles and expands into a raised image. At that point I sprayed the whole piece with a colourwash, then used hot foils to highlight the highest areas of the main focal point with gold. (Not all foils use heat, some only work with glues.)

I then took a versatool and used the fine solder point, to 'cut' the Lutradur here and there,and wafted a heat gun over it for a while until it started to melt into small distressed holes.

The piece below was black Lutradur (70g weight), which was coloured using metallic paints. They give texture rather than lots of colour. Once painted and dry, I used Xpandapriont and a stencil to create the ferns, then heated them until they expanded. As this was a test piece, I used the fine soldering tool again, to cut some shapes into the Lutradur. You can use metal stencils to cut precisesly, the tip goes through the Lutradur like a hot knife through butter. I heated the whole piece with the heat gun, if you enlarge by clicking on the image, you can see where the cut and heated areas are.


This is fun stuff and I am sure I will be using it again.

Tuesday, 16 September 2008

Canvas with metal

Another birthday or two, another canvas or two! I made 2 similar canvases for friends with birthdays. I painted the canvases purple because one of them loves purple, then stamped a swirly flourish with Victorian Violet Brilliance ink. I made the heart embellishment by cutting up an aluminium can, then running it through the Wizard with a small Cuttlebug heart die. It left a deep mark in the cutting mat... I ran it thought the Wizard again in the little embossing folder, to emboss it, and gave it a coat of Ranger alcohol inks - Eggplant, Currant and Wild Plum.


Finally, I adhered the heart and buttons using sticky dots. I hope both friends like their presents!

Monday, 15 September 2008

Playing with fun foam

Today I made a 5 x 5 chunky book page out of fun foam (aka funky foam). I thought it would travel well, being bendy and waterproof!!! I heated the foam and stamped images into it while it was still hot. I protected already stamped area with a piece of mat board, so I didn't 'warm away' the first impressions while creating later ones.

This started out as green foam, I gave it a coat of Stewart Gill Metallica chestnut, then a coat of Stewart Gill Metallica bronze. Then I gave it lots of Treasure Gold wax rub on, in Olive, Copper and Gold.

I created the focal point by stamping onto a small sheet of mica, and used a piece of fabric paper behind the mica to make the image visible.


For the back of the page, I used the same paints and rub ons, but didn;t dare heat the foam again to stamp into it! So I stamped onto it with Brilliance Galaxy Gold - which you can just about see if you hold it at the right angle to catch the light! The image is a gel medium transfer onto fine cotton fabric, afdhered to the fun foam with more gel medium.


I enjoyed working with a different base so much, that I decided to make my next project out of fun foam, too!!! This swap involved making a set of 4 ATCs, representing the seasons. So, I heated the foam and stamped it withthe most appropriate stamps in my collection, and used Stewart Gill paints and Treasure Gold wax to colour them. Finally, each ATC had an embellishment added, to give a bit more depth and texture. Fun to make, I hope my swap partner likes them!


Saturday, 13 September 2008

Deco book page


This is one of the pages I am doing in a round robin of deco books. There are 16 of us and this is the seventh page I have done, the 8th is drying as I write!


Page is painted with Stewart Gill Byzantia paint, no name for the colour, it was a sale item! I gave it a coat of Jo Sonya Opal Dust to add glimmer, then painted the chipboard letters purple and adhered those. The image is fantasy film, using an Enchanted Gallery stamp inked with Stazon and ironed. Don't forget to put a layer of greaseproof or silicone paper between your iron and the fantasy film!


Another fanatsy film embellishment, on a stamped background. I used Pearlescent Crimson Brilliance Ink and a Stampcamp stamp for the background.

Thursday, 4 September 2008

In This House pages

On a (mainly Australian) swap group, we are doing an 'In This House' chunky book. We needed to make 15 pages each, using a standard template, where the total page height is 8 inches, and the width is 4.5 inches. Each of us had to choose a different theme for our pages, thereby ensuring no duplication within the books.


I chose 'The Welsh House' - Ty Cymreig - for my theme.

The front and backs of my pages were mat or mount board (used in picture framing), and I covered them with pages from an old Welsh language New Testament. I gave them a wash of lightly tinted gesso, to provide a chalky finish and a 'key' for what I planned to add.


For the front of the page, I created a digital collage, and printed it onto transparency, adhered top the page with Glossy Accents, and trimmed with German Scrap. The collage is made from photographs I have taken over the last year or so, and each element represents something form Welsh history, or which is culturally important.

The fossils represent the ancient landscape, where much of Wales was under the sea, while the modern landscape forms the background to the page. The carved standing stone represents the Celts, who were living in Wales 1500-3000 years ago. The Roman soldier represents the invaders who had such an effect on Wales 2000 years or so ago, the medieval character represents the Norman invaders, who arrived a1000 years o sao ago, and changed the culture and society completely. The timber framed roof is an image of a 1404 house in Beaumaris, the iron signpost in the bottom right hand corner reopresent the industrialisation of Wales (the world's first industrial country) in the 19th century, and the carved Ram's head represents the craftsmanship which abounds across Wales, and also the fact that we have so many sheep!!!


For the back of the page, I decided to use image transfers. I wanted the page to look older and more distressed thatn the front. I printed the reverse images out onto good quality photo paper (Epson double sided matte), then coated them with a very thin coat of soft gel, rapidly followed by a second coat, probably before the first coat was dry. Then I laid the immage onto the page, and ran them through my Wizard. It was easy to peel the paper off and leave the image on the page. I started with an image of a map of Wales:


and added two ladies in 17th century Welsh costume:


then a chapel:


and finally I picked a fern frond from my garden, dired it in the microwave, adhered to the page with gel medium, and painted over it with gesso. I hope I don't fall foul of the Australian customs people with that!

Monday, 25 August 2008

Birthday canvas

Another friend, with another birthday... this friend likes hearts, so I used those instead of/as well as buttons.


I painted the canvas with white gesso, then added a coat of Golden fluid acrylic in titanium buff, then coated the top half in Golden fluid acrylic raw umber, then added a little more titanium buff where the colours joined, to blend the edge a little.

I stamped some flourishes using Golden fluid acrylic bronze, then 'sewed' the hearts on with gold 28 gauge wire.

Thursday, 21 August 2008

Birthday canvas

Life has been way too busy of late, and I haven't really had much time to have fun, but this canvas for a friend's birthday was fun to do!!! The background is canvas painted with white gesso, then acrylic paint, then stamped with white gesso. The heart is fun foam - heated, stamped into while hot, and cut out when cold. A touch of rub on wax in a metallic finish adds something, too.


I hope she likes her 'birthday card'!!!

Monday, 18 August 2008

Victorian Gothic themed wedding

So, when a friend invites you to their wedding, and tells you it is 'Victorian Gothic' themed in terms of clothing, you have just the thing at the back of your wardrobe, don't you?

After trawling through what seemed like millions of websites, and a couple of costume hire shops, I decided I would have to make my own costume.

I'm not quite sure what Victorian Gothic looks like, but I couldn't find much in the way of sewing patterns, so I went for a 'kind of' medieval style of dress, and thought the dark colour of the taffeta fabric made it a bit more gothic. As the wedding was in mid August, when it is supposed to be hot here in the UK, I took the advice of the fabric shop staff, and lined the dress with antistatic/anti cling lining material. Of course, that meant making 2 dresses, and sewing them together round the neck. About half way through, I did begin to wonder about my sanity...


The front of the dress has a net panel, with small diamante gems and iridescent beading, using seed beads. I did the beading while working away from home last week - about an hour before breakfast and 2 hours after dinner for 3 days.


Husbands like to take pictures from the most unflattering angles...


The back of the dress is laced. We hunted everywhere for the right kind of ribbon or cord to lace it with, and eventually bought some braided cord in a pale gold, which I was dyeing with Adirondack colorwashes 2 hours before the wedding. I went to the wedding with very gothic looking deep green fingers LOL.

The bride wore a blood red dress with a basque style top and medieval sleeves. Only a few others dressed up, one lady had a black dress with some sequins and embroidery on the bodice, and several men wore frock coats, frilly shirts and cravats. I didn't feel too out of place, and the dress attracted a few compliments!

Monday, 11 August 2008

Iridescent gift wrap background

I have been in a fantastic 'angelic' skinny page swap which involved quite a few Australians. Some of them had used fantasy film in an interesting way on their pages. They had stamped and embossed an image onto their backgrounds, coated the page with gel medium, added fantasy film and heated. The embossed pattern shows through the fantasy film - a really neat effect. I tried it with a couple of chunky pages I am making and it was a complete disaster - the fantasy film shrank and distorted the pages beyond any possible flattening out. I wondered if I had done it wrong, or should try again using much thicker cardstock.

While I was thinking about this, I remembered some other 'stuff' - a year or two ago, Zeborah (see blog links) was playing with some iridescent gift wrap, trying to make 'faux dichroic glass'. I couldn't get any of the giftwrap here in the UK, and 'Legs' (http://www.picturetrail.com/queenoftexas) very kindly sent me some. I have since discovered fantasy film, which is thicker, has better colour, and stands up to heat better. However, for this technique, I think the thinner iridescent gift wrap has the edge.

I painted some cardstock with Stewart Gill Byzantia Aegean paint, then embossed it with a Stampcamp stamp which looks like the veining in rock, and a deep green iridescent embossing powder. I coated this with some gel medium, laid the gift wrap on top, and zapped with my heat gun. This is how it looks:


I then used the background to make some ATCs - for this one, I stamped onto heatproof acetate, and embossed the image in white. It is adhered to the ATC with Glossy Accents.


For this one, I stamped and embossed the image on acetate, then added some embossing to the background so that it is hard to tell where the acetate begins and ends.


For the final ATC, I dumped a small pile of 'Macquirie' Opals embossing powder onto a craft sheet, heated until melted, then stamped into it using this stamp from Cre8it. Once it was cold, just peeled it off the craft sheet and stuck it onto the ATC.


Saturday, 9 August 2008

Had to have it swap

For this swap, you had to use something that you 'had to have' at the time you purchased it, but haven't actually got around to using! There were so many things in my stash to choose from...


In the end, I chose 3 things - some charms which I love but couldn't bring myself to use; a pasta machine which I had bought with the intention of conditioning polymer clay; and polymer clay, which I bought ages ago but haven't had the confidence to play with.


I covered some mountboard (about 2.5 inches by 4 inches) with brown paper, and gave it several coats of purple Stewart Gill True Colour paint (I still seem to be on the 'purple' trip!).

I stamped it with a texture stamp in Brilliance Galaxy Gold, and didn't like it, so gave it another coat of purple!!! It does have slightly more depth as a result.

I used black Fimo polymer clay for the embellishment in the centre - Fimo is most commonly available brand of clay in the UK. I conditioned it in a pasta machine, then stamped into it with a flourish stamp. I trimmed it into a tile shape, and brushed it with purple and gold PearlEx before cooking it in my Melt Pot (which I hardly ever use).

I attached a little hanging bracket to the back, and adhered the polymer clay tile and charms to the front, using Golden extra heavy gel medium. I hope my partner like it, because I will have a little trouble letting it go!


Guestbook

Blog Archive

Copyright

Please note that I assert myself as the creator of all art on this site (unless I credit another artist) and retain copyright of all artwork posted on this site