Tuesday, 24 July 2007

Gesso Shabby Chic ATCs


I used the background I made to create a set of 3 ATCs.
As I had used a Cory Celaya stamp to stamp into the gesso,
I used three more Cory stamps to stamp into air dry clay,
and then painted them with Stewart Gill Byzantia 'Laurelius' paint.
Once that was dry, I gave the embellishments a quick rub
with turquoise Rub'n'Buff.

I added some coloured mica flakes to the corners,
and mounted them onto a background I made
some time ago using colourwashes
and interference embossing powder.

These are going to my friend Maggi,
I hope she likes them!


Sunday, 22 July 2007

Textured gesso

I have been playing with gesso.
I am running a swap on CC Swaps,
where I have asked the players to use one of
four techniques using gesso, so I thought I would have a play
and see which of the techniques I liked best.

The samples below are 'textured gesso'.

The top sample is a piece of cardstock painted
with a thick layer of black gesso, and stamped into
with a flourish stamp while the gesso was still wet.

It looked interesting,
but didn't really do that much for me.


And then I gave it a rub with rub'n'buff wax.
Wow, it really showed the texture, and I LOVE it.

The samples below were rubbed with
rub'n'buff in turquoise (left) and gold leaf (right)


The samples below were rubbed with
rub'n'buff in antique gold (left) and amethyst (right)


The sample below is white gesso,
stamped into with a Cory Celaya stamp

(from After Midnight Art Stamps)
and rubbed over with turquoise rub'n'buff

and tiny touches of gold leaf rub'n'buff.


It looks kind of weathered and 'shabby chic'.


Saturday, 21 July 2007

Black & White


Another swap - this time the theme was black & white with a touch of red. I created my ATC and then thought a 'negative' version might be fun, so created that too.

It didn't look as good as I expected, considering all I had done was to reverse the colours - I guess it is all in the way we perceive things...

Neglected Colours ATCs

I made these 2 ATCs
for a swap entitled
'neglected colours'.

These are colours I never use, but might start using from now on.

The slide mount on the right and the matting under the flying beastie below have been painted with Golden acrylic micaceous iron oxide paint. My friend Jessie sent me some, and I have only just started playing with it but I already know
I LOVE the stuff.


Wednesday, 18 July 2007

Canvas


Been playing with canvas for another swap - this is the final version,
and wish I could take better photographs.
The canvas is more purple than the picture shows,
and the area within the 'picture frame'
is actually coated with crackle glaze.
The picture frame is made from texture paste,
applied to a masked off area, allowed to dry, and painted gold.

Monday, 16 July 2007

Altered bottle


I recently ran an 'altered bottle' swap on CC Swaps Yahoo group. I had originally altered a bottle by melting it a little and coating it with patinating paints, but noticed the paint was flaking off after a week or so. I assumed that this was because the bottle didn't have any 'tooth' for the paint to hold onto. I guess I either need to sand the bottle first, or better still, cover it with tissue before I paint it. The bottle above is the one I finally sent my swap partner - it began life as a 'Pom' bottle full of pomegranate juice.

I drank the juice - yum - and then used a versamark hot knife to trim the bottle top - it had mouldings in the shape of the top of a ;pomegranate, so i just followed the moulding with the blade. Than I used PVA glue to stick tissue all over the bottle, overlapping and crinkling as I went. Once dry, i painted it with Aubergine colour wash - diluted with 3 or 4 parts water. It looked a bit dull, so I stamped it all over with a tiny stamp and Galaxy Gold Brilliance ink. It still needed 'something' - shine, I thought, so I gave it a coat of gloss medium, which made the colourwash run :(

I decided the colour was too blue and needed to be a warmer shade of purple, so I gave it a quick dab of amethyst rub'n'buff, and stuck 2 sun charms on. My art often takes on a life of it's own, and this project was no different. I am not sure I am completely satisfied with the final object, but I know we are all our own worst critics, so I tried to be objective about it - and decided that if I saw it in a shop, I would like it. I hope Fiona likes it, too.


Sunday, 8 July 2007

I've been tagged!

I've been tagged for the first time by Betsy -


http://innovativestampcreations.blogspot.com/2007/07/ive-been-tagged-lol.html

and now I have to tell you 7 things about myself!

1. I have an 'empty nest' - my 24 year old daughter and 22 year old son left home a while ago....

2. I drive a battered 13 year old black Renault 19

3. I hate liver

4. I love cherries

5. I have 3.5 grandchildren - one girl, 2 boys and a 3rd boy on the way...

6. My favourite flowers are Auriculas

7. I am a mongrel - ancestors from Italy, Ireland, Sweden, Scotland & England!

Bloggers I've tagged:

http://anniesatticroom.blogspot.com

http://fionascreations.blogspot

Radiant rain experiments


If you spray the radiant rain lightly, it works like any other colorwash spray, but with more intense & colourful glimmer. The mica has been coloured to match the ink, which is why it is more intense. The piece on the left was sprayed lightly with copper, and a blue.


If you spray the Radiant Rain more generously, especially on less absorbent surfaces, it 'clumps' together, and creates the effect you can see on both samples with a dark background.

The top one was done with Interference Gold on black glossy cardstock.

The next peice down was a mixture of Interference Violet (top), Interference Red (middle) & Interference Blue (bottom) on black satin cardstock. The Interference Red looks more like gold to me.

The final piece was Jasper red, oversprayed with bronze, on matte textured white cardstock.

Saturday, 7 July 2007

Radiant Rain

I am in LOVE!!! I ordered all the Radiant Rain sprays from Fran the Frantic Stamper. I was confident that as Zeborah loved them so much, I would too LOL. I have studiously ignored them for DAYS as I was concentrating on Teesha, but today I had a little play! The interference colours are great on black glossy, and the shimmer of the colours on white glossy and matte is fabulous. By accident, I doscovered something interesting. I laid textured kitchen paper towel under the sheets I was spraying, to catch the 'extra'.

I noticed that with the Red Jasper spray, it seemed as if the red was staying on the raised areas, but the more condensed areas seemed to be showing bronze. So, I took a couple of fresh sheets of kitchen towel off the roll, and sprayed away... and as you can see, you get a 2-tone effect which reminds me of the flock wallpaper you used to see everywhere in the 1970s LOL. I must try this with other colours to see what happens!

Friday, 6 July 2007

Teesha pages 'how to'

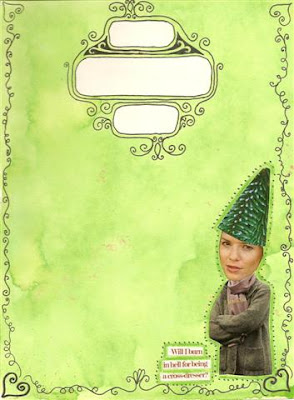
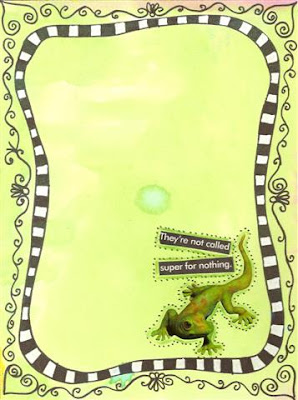
A few people have been in touch to ask how I created my 'Teesha style' journal pages. Basically, I followed Teesha's instructions:

http://www.teeshamoore.com/latest_news.htm

and looked at her finished & journalled pages for inspiration, and a 'feel' for her style:

http://www.teeshamoore.com/teeshasjournalpgs.html

I used Fabriano Artistico hot press watercolour paper, cut into 15 inch by 10 inch sheets, and made 4 pages per sheet. Almost all my backgrounds were done using colorwash sprays - some really vivid and metallic colours by Outside the Margins:

http://www.outsidethemargins.com/colormists.html

and some of the lovely pastel and summery colours by Sticky Fingers (a UK company) which are sold by my friend Carol (even though they are not listed at the moment!) who does a good deal on international postage:

http://stores.ebay.co.uk/Stampattack-Art-Stamps

Once the backgrounds were dry, I added images cut from magazines - mainly from various gardening magazines, Waitrose Food magazine (many of the witty phrases!) and Country Living magazine. The images were often from adverts, I just cut them out and stuck them down using a glue stick. Once dry, I 'dotted' around them with a black Sharpie. Then I took a watercolour pencil (Derwent) and coloured around the edge of the image, between the image and the line of dots. I also drew the page borders with a black Sharpie - and one or two finer ones with a 0.7 black Staedtler pigment liner.

All the white areas were done with a correction fluid 'roller ball' pen - I tried Pilot Super Colour white, Sakura Permapaque, Sakura Souffle, and a Sakura Glaze pen before buying the correction fluid pen. Most of them didn't show on the colourwashes - the souffle and the glaze pen did a little, but not BRIGHT white, which is what I wanted.

It was really FUN to do the pages once I got going.... Why not try some yourself and see????

Thursday, 5 July 2007

Finally Finished Teesha

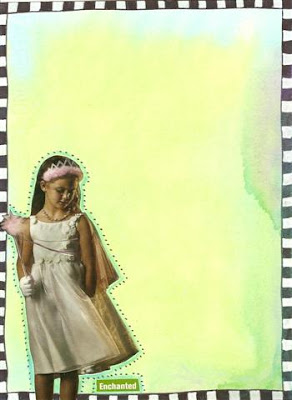
These are the A4 pages for the Teesha swap.
I have made 80 in total, and will keep 20 for myself,
sending the other 60 off to Sweetpea to swap out.
I hope the recipients like them!


Guestbook

Blog Archive

Copyright

Please note that I assert myself as the creator of all art on this site (unless I credit another artist) and retain copyright of all artwork posted on this site