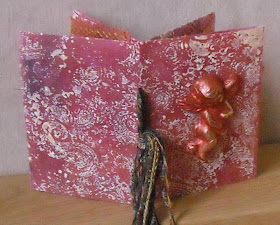
I decided to use lutradur to create a quick folded book.I also had an uncharacteristic romantic moment!
I painted some lutradur with crimson fluid acrylic paint. Once dry, I stamped all over it with white gesso, and left that to dry. I then gave a coat of nickel azo yellow fluid acrylic to tone it down a little and blend the stamped gesso into the background. I folded the lutradur in half lengthways, then in half, then folded the halves back on themselves. I slit the lutradur down the between the middle two sets of 'pages'. That's probably as clear as mud but you can work it out from the picture below!

I painted some Crafty Individuals images with matte gel medium to dull down the shine and give a kind of 'canvas' effect, then glued them onto the lutradur with more gel medium. I took some more lutradur, printed it with the same colours, then laid it onto a ceramic tile and used a versamark tool with soldering tip to 'cut' it into strips with wiggly edges. I sewed these strips around the pictures to make 'frames'. After gluing a few heart shaped sequins on, and punching two holes and threading fibres through to hold the book together, I just glued the pages together for a bit of strength. Voila, a quick folded book!


For the cover, I made a cupid using air dry clay and a mould. I painted it with white gesso, then the same crimson paint I'd used on the lutradur. Once dry, I rubbed it all over with Treasure Gold in 'ruby' and just touched the high points with Treasure Gold in 'whitefire'.

 I hope Claudia likes it!
I painted some lutradur with crimson fluid acrylic paint. Once dry, I stamped all over it with white gesso, and left that to dry. I then gave a coat of nickel azo yellow fluid acrylic to tone it down a little and blend the stamped gesso into the background. I folded the lutradur in half lengthways, then in half, then folded the halves back on themselves. I slit the lutradur down the between the middle two sets of 'pages'. That's probably as clear as mud but you can work it out from the picture below!

I painted some Crafty Individuals images with matte gel medium to dull down the shine and give a kind of 'canvas' effect, then glued them onto the lutradur with more gel medium. I took some more lutradur, printed it with the same colours, then laid it onto a ceramic tile and used a versamark tool with soldering tip to 'cut' it into strips with wiggly edges. I sewed these strips around the pictures to make 'frames'. After gluing a few heart shaped sequins on, and punching two holes and threading fibres through to hold the book together, I just glued the pages together for a bit of strength. Voila, a quick folded book!


For the cover, I made a cupid using air dry clay and a mould. I painted it with white gesso, then the same crimson paint I'd used on the lutradur. Once dry, I rubbed it all over with Treasure Gold in 'ruby' and just touched the high points with Treasure Gold in 'whitefire'.

 I hope Claudia likes it!


