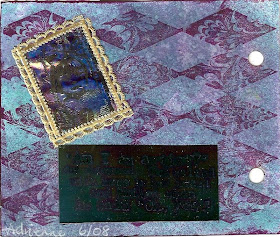
Saturday, 28 June 2008

Architecture swap for Fiona

I have been working on an architecture themed swap today. As you read this, you will begin to see how my mind works, and also how my artwork never ends up anything like the original plan!

I fancied the idea of a little shrink plastic 'house' that opened. I took pieces of shrink plastic that were 4.5 inches tall and 2.5 inches wide, cut some diagonals off to make a roof shape, sanded, coloured, stamped and shrank.

The front doors

The inside of the front doors


The inside

The back.

At this point, I decided that the whole thing was way too small to send as a swap, and wondered how big a piece of shrink plastic I could shrink to make a bigger house. When I looked at my shrink plastic stocks the question became immaterial, as I didn't have enough white shrink plastic to try!

And so began version 2 of the architectural swap...

Fiona had sent me a tin to alter some time ago. I decided to use it as the basis of the swap. I painted the tin with 4 very thin layers of black gesso, then stamped the spots with brilliance ink. I fused some fantasy film using a stamp, Stazon and a hot iron, to create the embellishment. I edged the piece with cream dimensional paint. I may yet dust this with Pearl Ex to make it less stark. I attached the key and keyhole to finish the front.


I painted the inside to match the front, and created a little shrink plastic shrine. The shrine is two layers of shrink plastic, glued together with spacers after shrinking. The door opens and Fiona will be able to see who is inside.

I thought I had finished at this point, but decided the left hand side looked too bare.

I searched through my stash and found some clear shrink plastic wings left over from another project, so that led me to think of an angel... and this Paper Whimsy image that was just the right size. It still looked a little stark, so I decided she needed a halo. I also decided I should have painted that before I stuck her in!!! Which is why she ended up with a blue starry halo.......

I hope Fiona likes it!


Playing with moulding compound

I bought myself some 2 part silicone moulding compound from Polymerclayexpress. It is $7 for a small pot - considerably cheaper than some of the big brands available on other websites and in the shops, and it works just as well. In fact, mould'n'pour costs £13 here in the UK, almost 4 times the price.

Actually the compound from Polymerclayexpress works better, as it has a 10 minute curing time instead of a 3-4 minute curing time. So you have lots more time in which to work, if you need it. if you want a quicker result, Polymerclayexpress also do a yellow version which cures in 2 minutes or so. You don't have to use a whole pot at once, like I did!!! I did mix it up a bit at a time, but once I had made the first 2 moulds, I got carried away and kept going until the pot was empty! It took maybe 20 minutes to make these. Eleven moulds for $7 has to be a bargain, and I also know that the embellishments I make will be different from those that I see on most other people's artwork.


I bought the charms form Fancifuls Inc a while ago. They have the most extensive and fabulous range of charms there, in a wide range of sizes. if you go to their website, take a big pot of coffee because you will be there for a while. And their website does take a bit of navigating. I have to have a pen and paper by my side to write the codes of the ones I like down as trying to find them again is too time consuming!

I LOVE charms, but there are times when you don't want a metal embellishment, or even a shiny embellishment, and when you need an embellishment that is more flexible than metal. So, a mould opens up the possibility of having the same motifs in air dry clay, in whatever colour I want!


The other moulded items are some resin sticky backed embellishments I bought during my trip to the US last October. I have never seen them here, so I thought I would take moulds of them to re-create them in air dry clay once I have used the embellishemnts on projects.

Wednesday, 25 June 2008

Oriental Little Beauties

As many of these have raised embellishments
on them, they proved difficult to scan.
My photos are not that much better,
but at least they aren't all blurry!


These were made by adding 3 layers of deep green
embossing powder to chipboard,
stamping into it before it cooled,
and adding shrink plastic and metal embellishments.


Shrink plastic & metal embellishments mounted
onto oriental printed mirror card
- coloured red with a Stazon pad -
and layered onto black glossy card.


The left hand Little Beauty is an air dry clay
embellishment (Krafty Lady mould) mounted
onto a handmade scrunched magazine background.

The centre one is stamped (Curtis Uyeda at Paula Best)
and embossed and layered onto a handmade background,
and the one on the right is stamped
onto black card with Versamark,
brushed with Pearl Ex and sealed with hairspray,
then mounted onto gold mirror card.


The Little Beauty on the left is stamped
and embossed onto printed paper,
layered onto black glossy card
and finished with a peel off.

The one on the right is an air dry clay moulded
embellishment (Krafty Lady) mounted onto
black glossy card and finished with red peel offs.

Sunday, 22 June 2008

Autumn's deco

This page is for Autumn's book.
I know Autumn likes mermaids and I did
consider them as the theme for this page,
but decided that as many friends have sent a mermaid
to Autumn this month, she probably has enough
mermaids right now! I decided on women, instead...

I used a page from a Welsh book,
some stamped tissue, some textured card,
and a Little Beauty sent to me
by Carol Sweeney (see blog links)


For the back of the page, I sprayed the card with several
shades of blue colourwash, and it was very bright.
I felt it needed to look 'older' to go with the front,
so I gave it a wash of walnut ink to age it.
I stamped it with a texture stamp from Hearts in Touch,
and framed a Crafty Individuals transparency
with a frame made from a Crafty Individuals
'framed bird' stamp with the centre removed.


Sweetpea's deco book

I worked on a couple of pages for Sweetpea.
I had seen Annette in Oz (see blog links)
do some work using cuttlebug folders
in a slightly different way,
and wanted to try for myself.


I quite like the textured effect,
but need to work on the technique some more,
as I like the way Annette's colours blend
more than mine!!!

I also had a play with laminating fantasy film,
to get a slightly firmer embellishment than the
kind I get when I iron it onto stamps.
The sheets are stiff, and can be stamped on.


I found out it gets some interesting striped effects
as it gets heated inside the laminating pocket.

I also found out that Brilliance ink takes even longer
to dry on laminating pouches than it does
on shrink plastic or acetate...

Friday, 20 June 2008

Final Diamond tip in page

The background card had small flecks of deep blue and red,
so I changed from black to blue...


The embellishments are stamped white shrink plastic,
tissue and background done as in previous posts.


Thursday, 19 June 2008

Another Diamond tip in page

I used the same background stamp as in the last piece,
but on slightly darker cardstock.
I also used the same stamped tissue paper,
but with gold layers instead of silver,
and a Paper Whimsy image instead of shrink plastic.


This one's staying in the UK, I hope Karen likes it.

Wednesday, 18 June 2008

Diamond tip in page

I'm sticking with the black and white theme
for the moment.

It looks classy and clean - and
my work doesn't often look clean!

This is a tip in page, with the theme of 'diamonds'.


I stamped the background using an Innovative Stamp Creations diamond swirls stamp and Brilliance graphite black. I stamped a strip of white tissue with the same ink and a Stampers Anonymous stamp, then rubbed the whole strip with Brilliance Galaxy Gold ink. I rubbed a piece of textured black cardstock with Brilliance Galaxy Gold, then stamped a Diva Impressions stamp onto white shrink plastic, and shrank it, then layered that onto the black cardstock and some silver cardstock. Some fake jewels and shiny metal stars finished the piece off.


The back of the page is similar to the front, except that the image is full sized and stamped in Brilliance Lightning Black, so it has a gold shimmer.

Tuesday, 17 June 2008

Final page for round robin

The final page in the final book in this round robin was to have a page using a colour that nobody else had used in the book. I didn't fancy orange or yellow, so I went for charcoal!!!


I painted the pages with 2 coats of Golden micaceous iron oxide, then stamped and edged with Galaxy Gold Brilliance ink, and added the embellishments. There is a surprise for the owner under the larger panel.

I have really enjoyed this swap, and seeing all the work that others have done in the books. I hope all the owners like the books they get back at the end of the swap!


Mermaid thing still going on!

This is another page for the round robin altered book swap - and there are yet more mermaids.


I sprayed the pages with several blue colorwashes, then closed the together and peeled them apart - and found I had something which reminded me of currents swirling, so I went with the flow (ouch) and created a sea based spread.

The nets down the sides are made by laying cling film onto silicone baking paper, spritzing with Johnson's Klear floor polish (Future in US), making some artisitc wrinkles, colouring them with colorwash sprays, then adding a top sheet of baking paper and ironing the whole 'sandwich' with a hot iron. Peel off the baking paper, the resultant sheet can be cut with scissors and glued using double sided tape or gel medium.

I added words, images and charms, and it looks done to me!


Monday, 16 June 2008

Mermaid wall art

I made a small wall hanging for a friend who loves mermaids. I have always loved the work of Diana Twedt, who uses foam board to good effect, and tried following her instructions as to what to do.

I didn't have some of the supplies, and all did not go to plan!!! I adapted and substituted and it all took much longer than I thought, and maybe it will never completely dry as a result.


The basic plan is to cut foam board to the shape you want, then adhere torn brown paper to it. Once dry, apply moulding paste, and add texture by stamping into it or drawing with the pointed end of a paintbrush. Once dry, paint with the darkest colour and highlight with other colours. I used Stewart Gill Byzantia paints as they are very rich and shimmery. Once dry, rub lightly with rub on wax - I used Treasure Gold.

The mermaid is made from fantasy film. Ink up a stamp with Stazon, lay 2 layers of film on top, lay a sheet of silicone or other baking paper on top, iron with a moderate to hot iron. Peel off stamp and trim. I adhered my mermaid to gold cardstock, using Golden gel medium, then adhered the cardstock to the back of the 'frame'. The result is a very lightweight piece of wall art.

Tuesday, 10 June 2008

Deco book for Dawn


The purple theme continues!!! And although it looks like there's some pink in there too, that is just the way the Fantasy Film reflects light at one angle - it doesn't look pink at all when viewed from a more direct angle. Scanning this stuff is useless, it reflects too much, so I 've resorted to some photography instead.


The background is made by spraying a couple of Tattered Angels glimmer mists and a Sticky Fingers ink spray onto a craft sheet, then the card laid on top and swirled a bit.

I stamped over it using Brilliance ink and one of may favourite stamps, from Stamp Camp.


The embellishments are made by laying stamps down, inking them up with Stazon, laying 2 layers of Fantasy Film or Stewart Gill Glitterati film over the image, a layer of greaseproof or silicone paper ontop, and ironing it using a dry iron at moderate heat. The heat fuses the layers fo film together and heat sets the ink onto the film.


Monday, 9 June 2008

Another Deco Book

I seem to be having a bit of a purple phase.
This is not like me at all!!!
I quite like the way it's turning out, though.
This deco page is for Carol C.
Hope she likes it too.


The panel at the bottom of the back
of the page is a piece of Shimmer Sheetz,
with text stamped onto it.
The colour of the sheet changes around the ink.
Neat effect - would be great if you could
see it on the scan!
The image inside the gold 'frame' is
a little girl, but again the
scan isn't showing it up very well.


Sunday, 8 June 2008

Green pages for round robin

I am taking part in a round robin altered book swap.
Each book has a colour theme.
The first book I worked in was yellow,
which I found hard.
This book is green,
and I enjoyed working in it.

Here is the first spread I did:


and here is the second:


The girl at the top of the right hand page is a piece of fantasy film, fused onto a stamp inked up with Stazon then peeled off. It looks coppery from this angle, but when you look at it form another angle, it is a completely different colour.


Monday, 2 June 2008

Vintage little beauties


More little beauties for CC Swaps - I wonder
when I'll get fed up of these?
Maybe when I can't think of a new theme,
or when nobody else signs up to swap them!

These little beauties are VINTAGE.

I am not too good with vintage,
so this is my take on it - not quite historic ladies
with bunches of flowers and bluebirds,
but vintage nevertheless!

Many of the images are from Paper Whimsy collage sheets.